Fix buttons on Logitech G Pro Wireless mouse
Middle button of my Logitech G Pro Wireless stopped working and that lead me to change all the buttons and the scroll of my mouse. Easy part was to disassemble the mouse, and more challenging part was to find out right names for these components and their dimensions. But searching and measuring i found out the right replacements, and this article is the outcome of this whole journey. Enjoy
Replacement middle button for Logitech G Pro Wireless
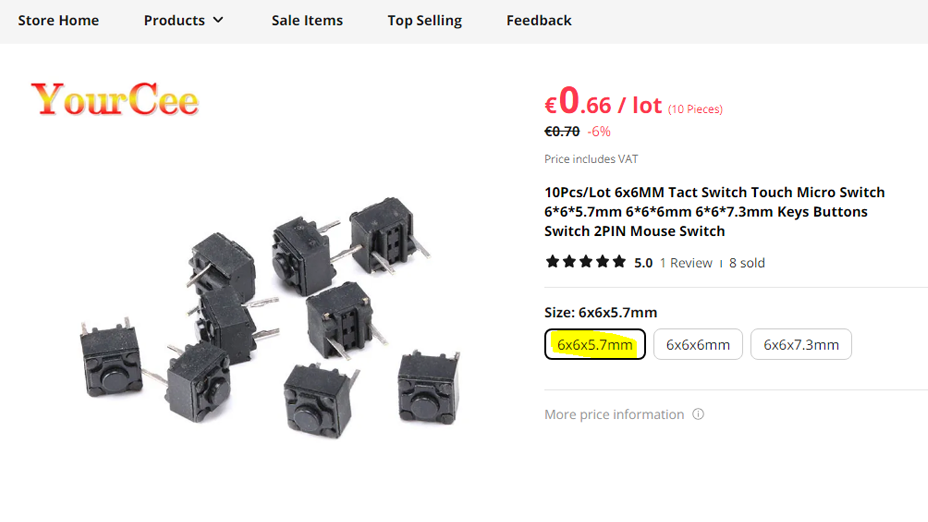
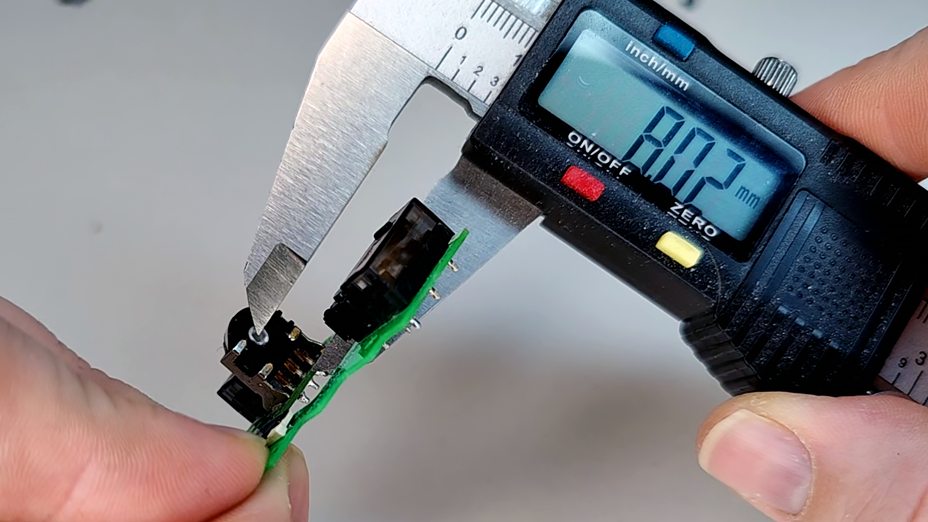
You can find replacement middle button for Logitech G Pro Wireless -mouse under the name Tactile Push Button / Tact Micro Switch. Dimensions for the middle button are 6 x 6 x 5.7mm.
On the left side you can see replacement and on the right side is the old one that stopped working.

You can measure the height of the micro button by measuring from the tallest part of bottom to the top of the switch.
Replacement buttons can be found for example here.
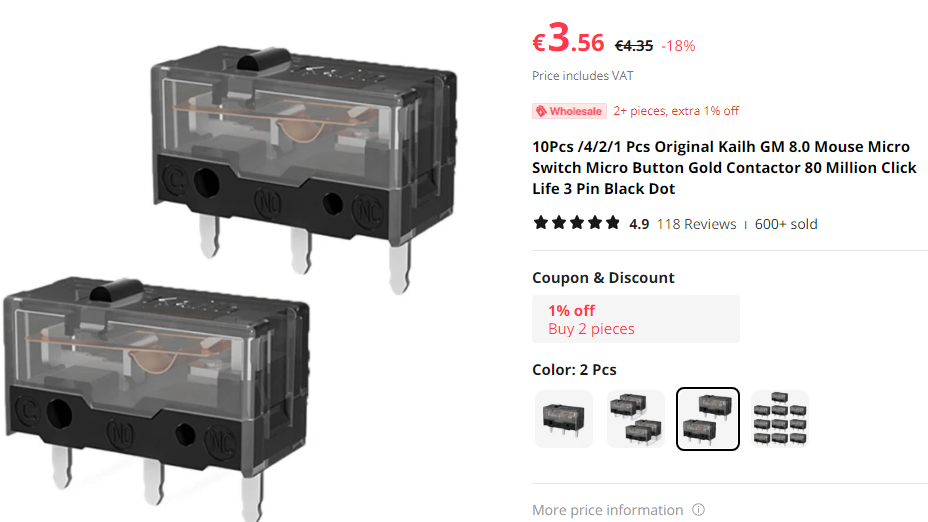
Replacement left/right click for Logitech G Pro Wireless
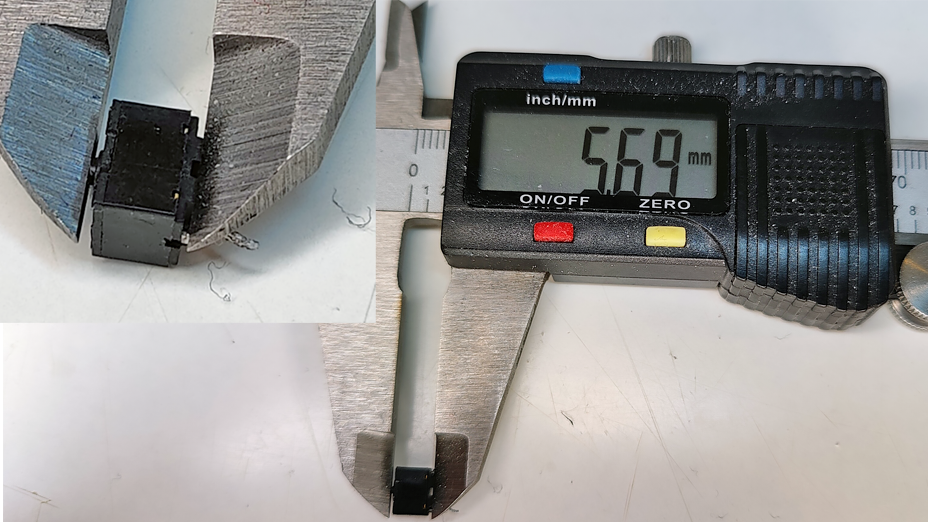
Left and right click buttons for Logitech G Pro Wireless -mouse can be found under the name Mouse Switch / Mouse Micro Switch. Dimensions for the button are 12.8 x 5.8 x 6.5 mm.
Popular replacement switch is called "Kailh GM 8.0". Specifications say that these switches should last 80 million clicks. You can find Kailh GM 8.0 switches here.
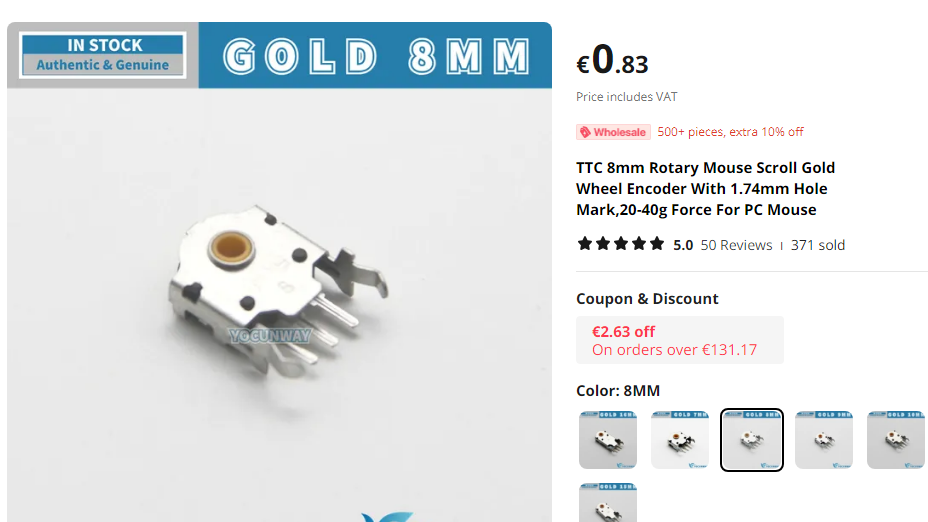
Replacement mouse scroll wheel encoder for Logitech G Pro Wireless
Mouse scroll wheel for the Logitech G Pro Wireless can be found under the name of "Mouse scroll wheel encoder". When we are talking about the Gold standard of encoders we talking about "TCC Golden wheel encoder" or "Kailh mouse scroll wheel encoder".
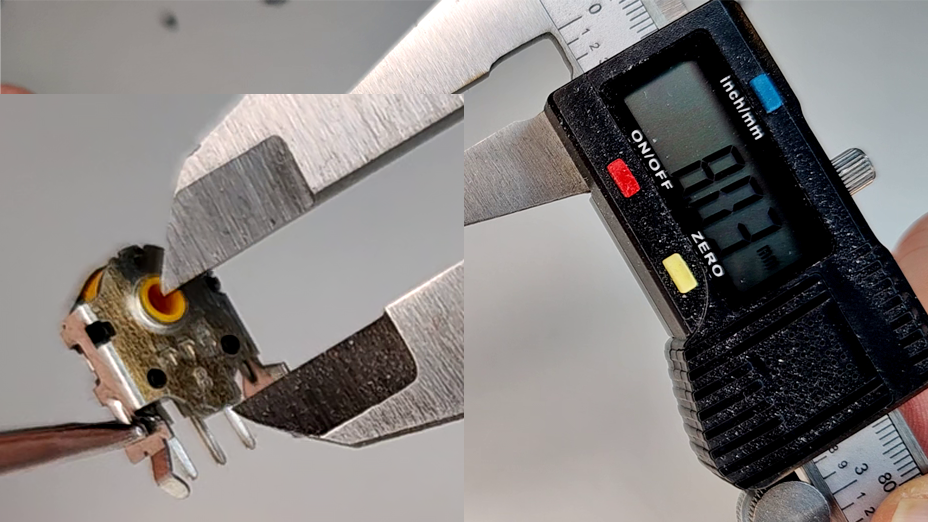
When you are buying wheel encoders you can see that they are sold in many sizes, 4/5/6/7mm and so on. That millimeter number is indicating the distance from the bottom of the scroll wheel to the center of the scroll wheel hole. There is usually number on the side of scroll wheel that is indicating that mm distance. Logitech G Pro Wireless mouse is using 8mm scroll wheel encoders.
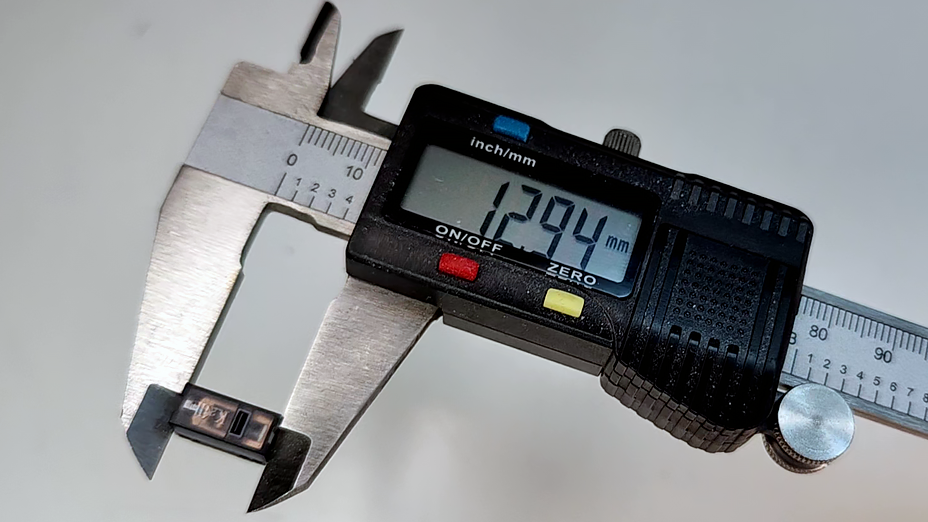
In this photo i am measuring 8mm TCC Golden wheel encoder. Height matches with the original so it can be used for the replacement.
You can find TCC Golden scroll wheel encoders here and Kailh scroll wheel encoders here.
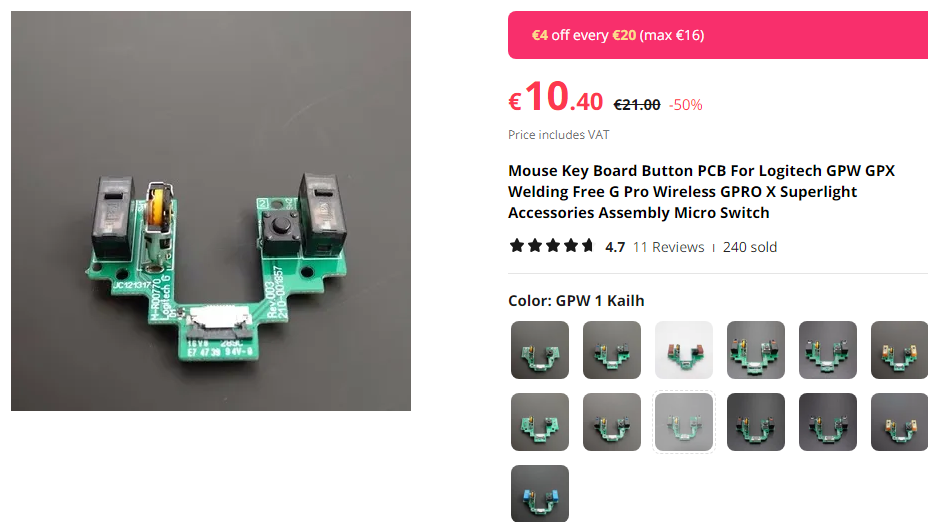
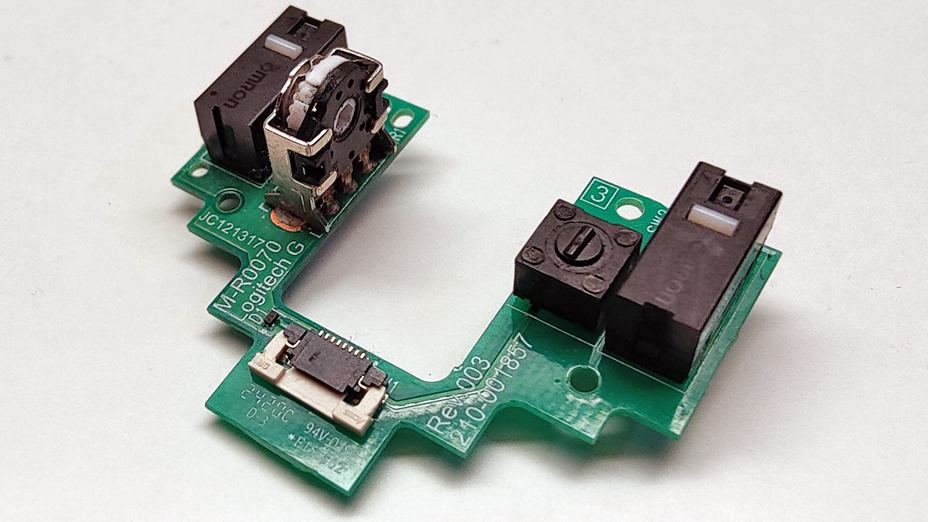
Replacement PCB with buttons Logitech G Pro Wireless
If you dont have soldering iron at your reach, you can also buy whole PCB with new buttons on it. You only have to open your mouse and put new PCB in place without any soldering. You can find those form Aliexpress and Ebay if you search for "logitech wireless pro pcb".
Disassemble Logitech G Pro Wireless Pro mouse
In order to access the screws underneath the mouse, you need to first remove mouse feets/skates. You need knife or anything sharp so that you can get underneath the glue.
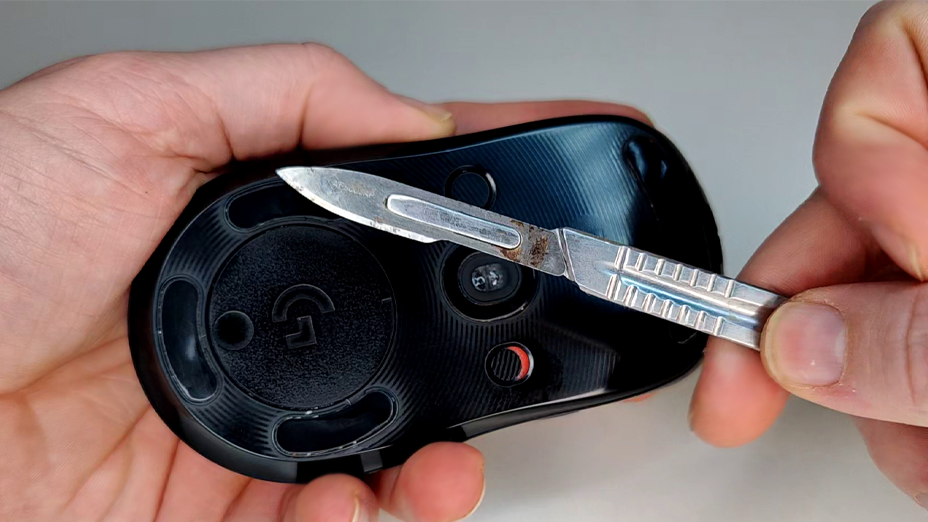
Make sure that you get your tool underneath glue, and not between the glue and feet. Otherwise you might remove glue from feets.
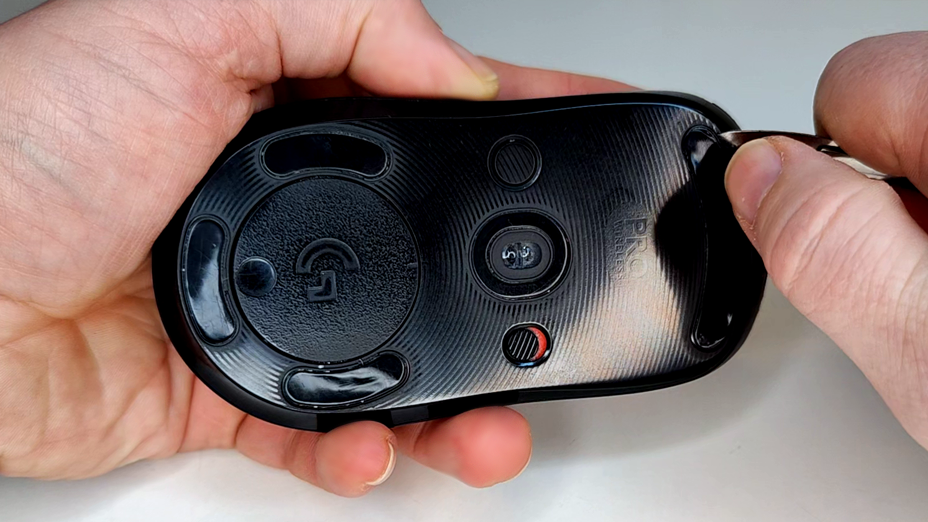
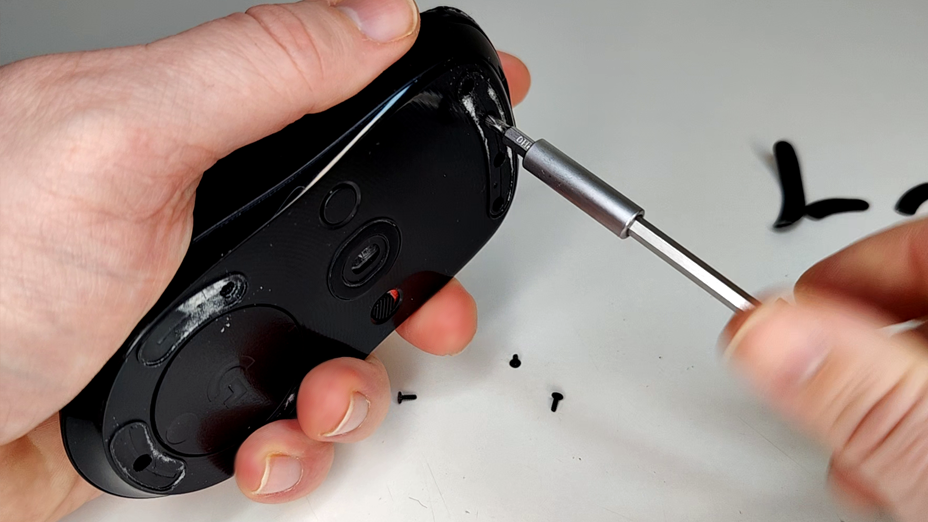
Once you have removed all the feets/skates you will see 7 screws.
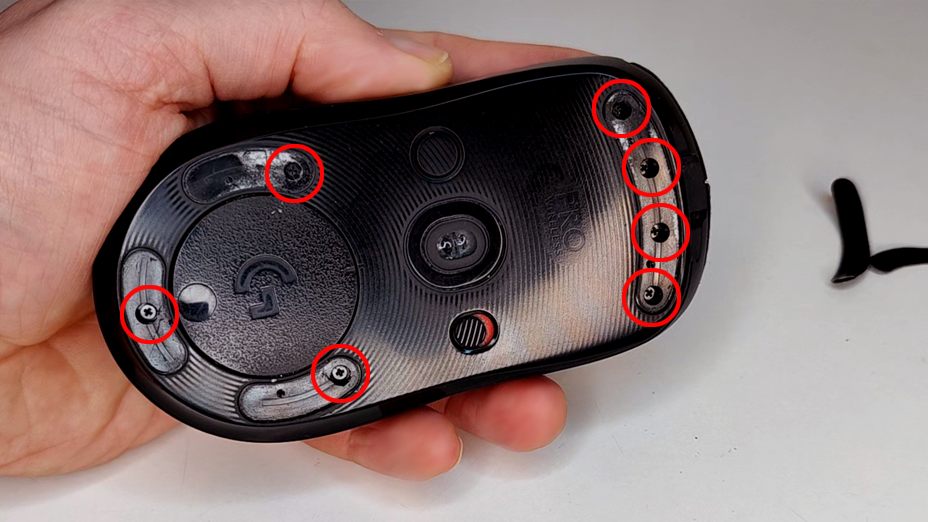
CAUTION! When you are removing screws, you need to remember that not all screws are same size. So don't do the same mistake i did and throw all in one container.
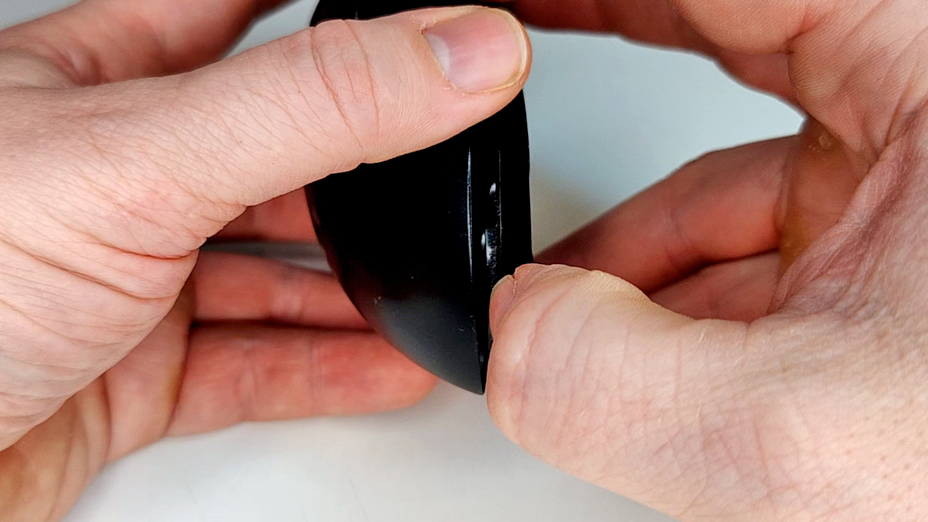
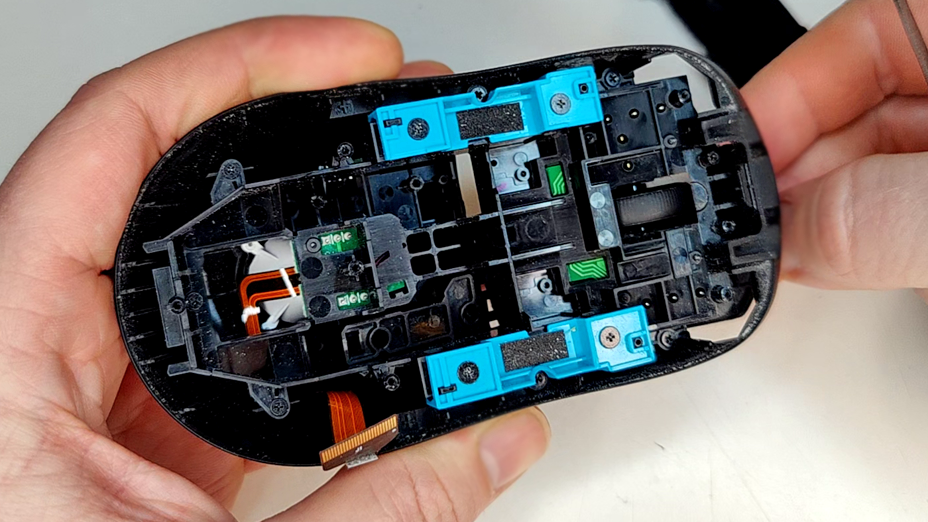
Once you have removed all screws, you can lift the cover off from back. You can just use your nail to get between the top and bottom part.
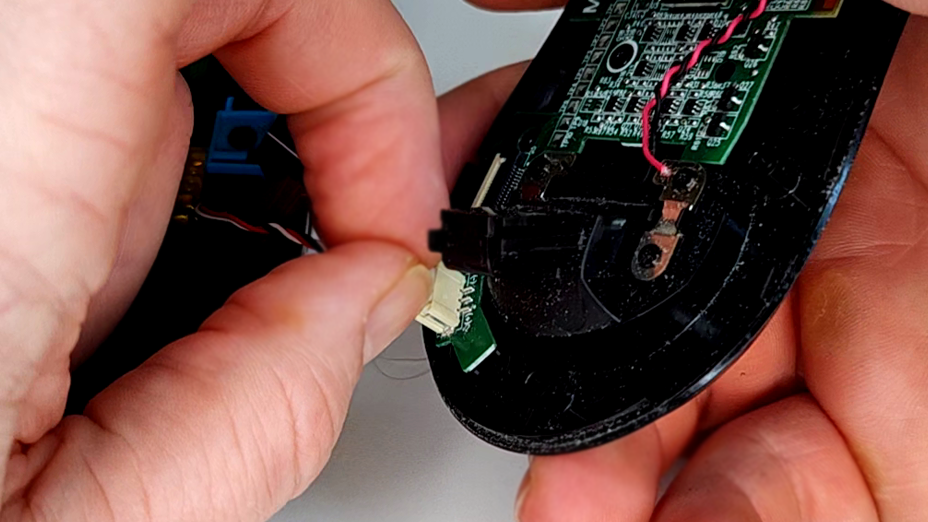
Next you need to remove flexprint cable and battery cable.
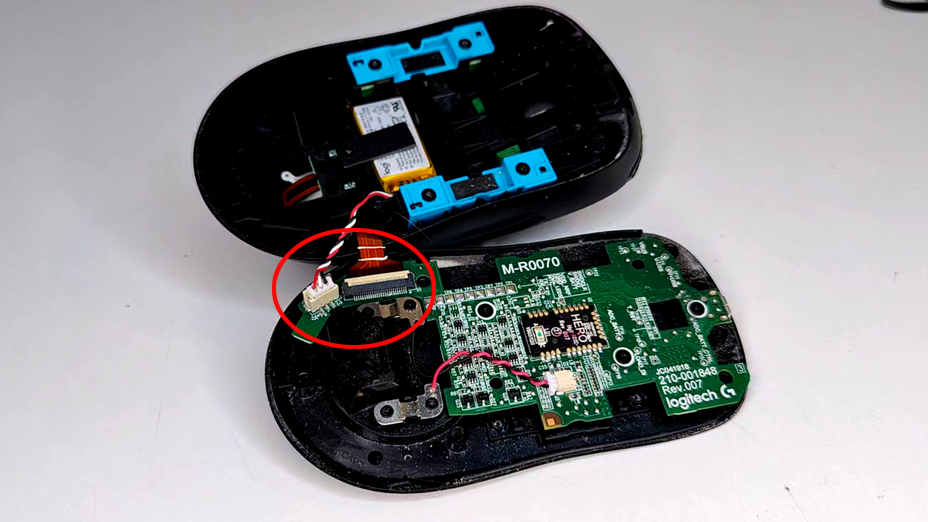
Use your nail to lift off holder that holds flexprint cable.
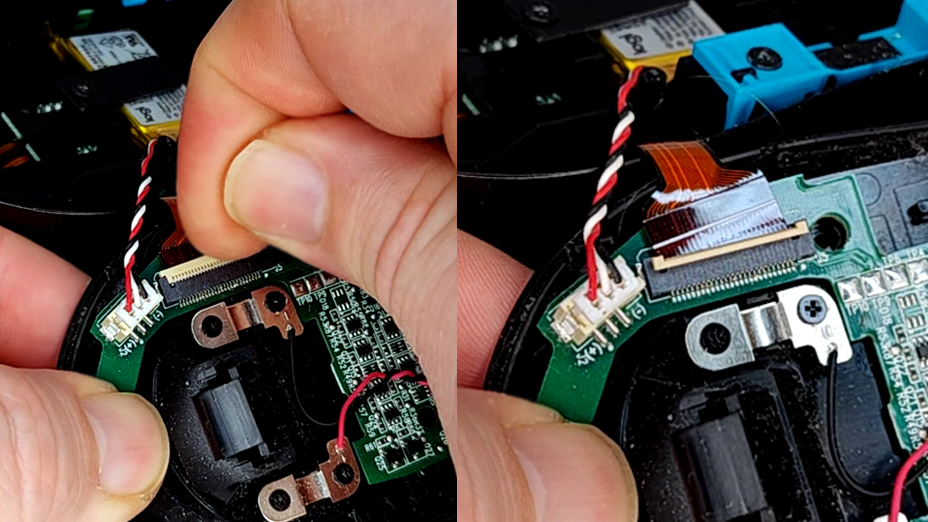
Use your nails or pliers to remove cable connector that comes from battery.
Next you need to open the screw that holds battery.
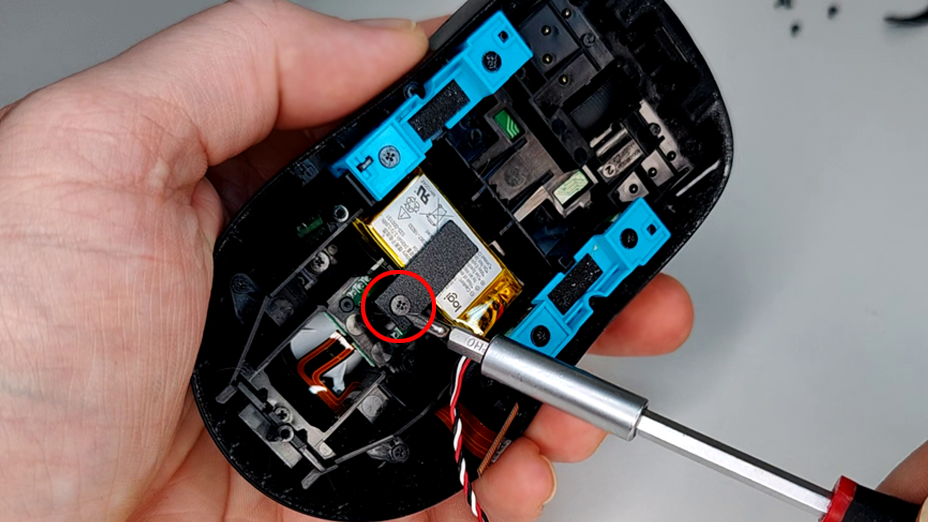
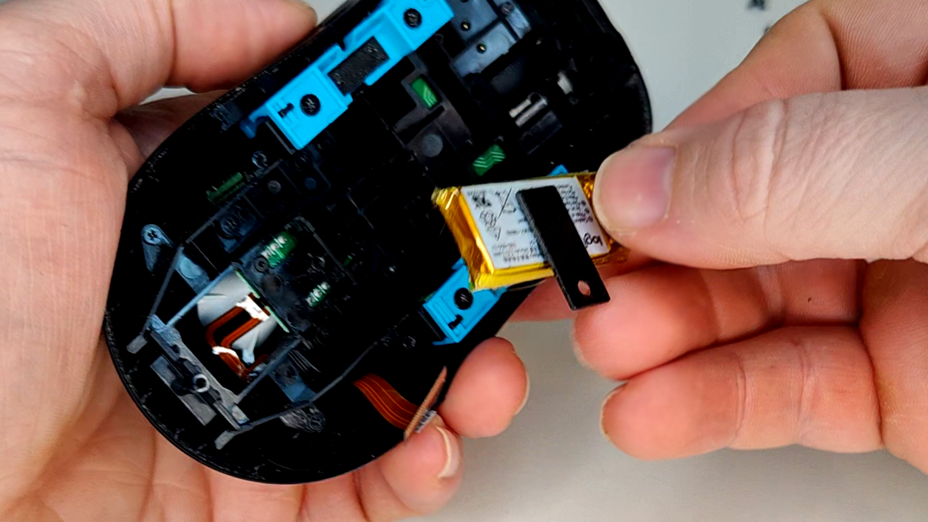
Now you can remove battery.
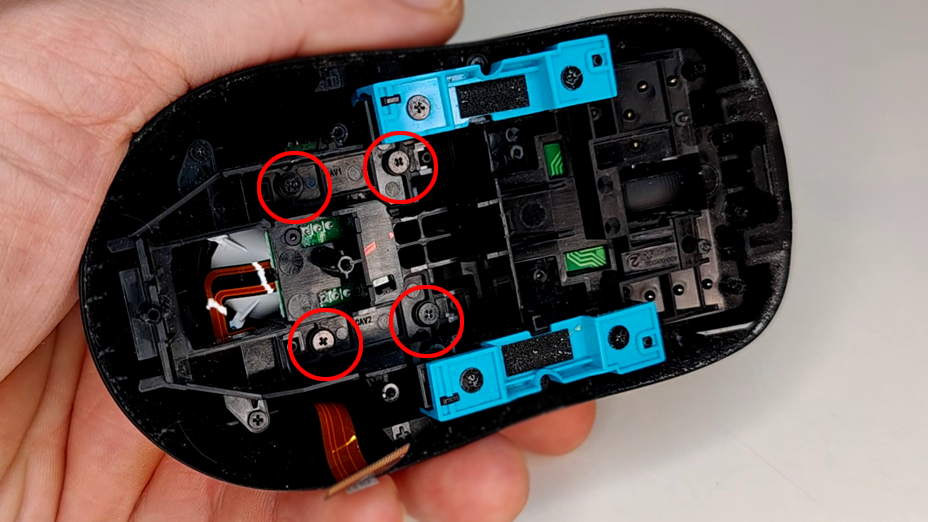
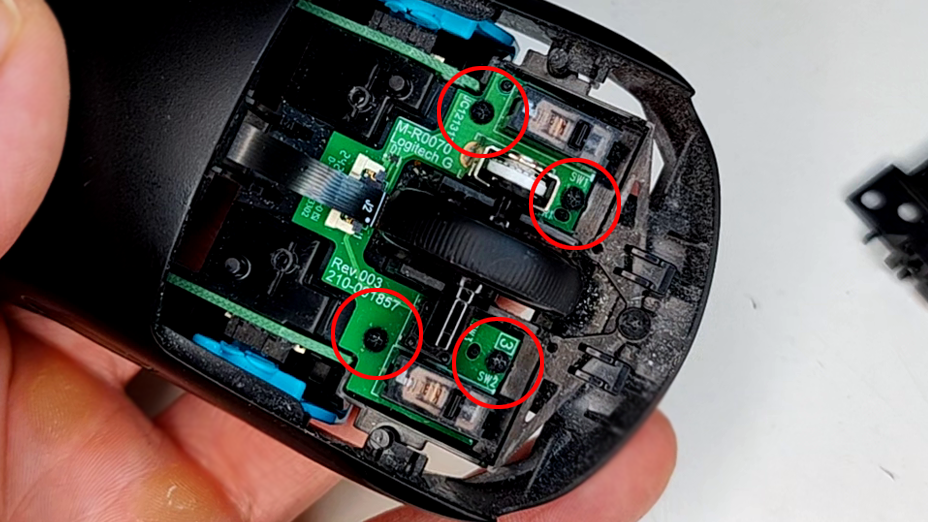
Next you need to remove four screws that are holding your left and right click. If your screwdriver doesn't have strong magnetic tip, you want to hold mouse in the air, and do the unscrewing underneath so that screws will fall down. Otherwise there is risk that those screws get sucked by the magnets on the sides, and it is really nice project to try to get them out there. Don't ask me how i know.
Once you get the screws out, you need to lift the back part of the left/right click so that it comes out of socket. On the right side you see where you need to get your finger and lift up. You will hear sound when you pull up enough.

Now you can just pull the buttons out.
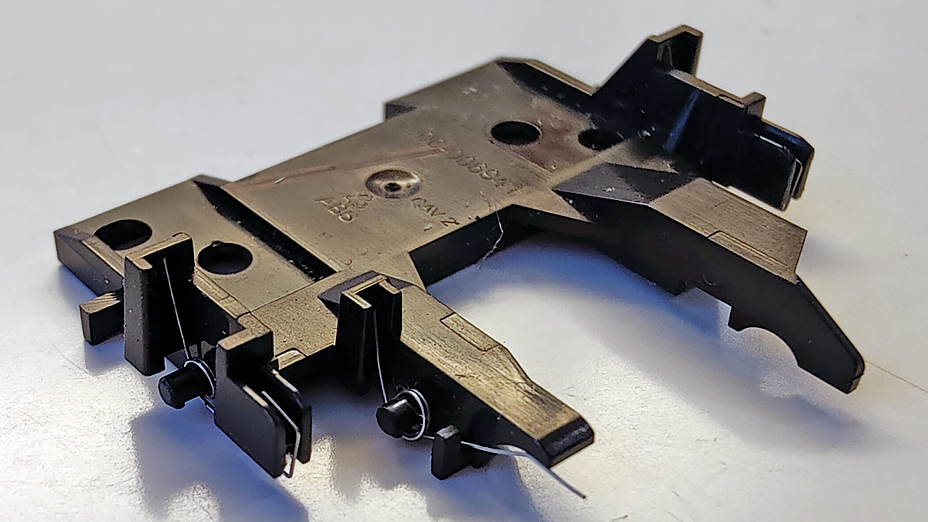
Next you need to remove two screws that keeps "spring holder" in place. It also holds mouse scroll in place.
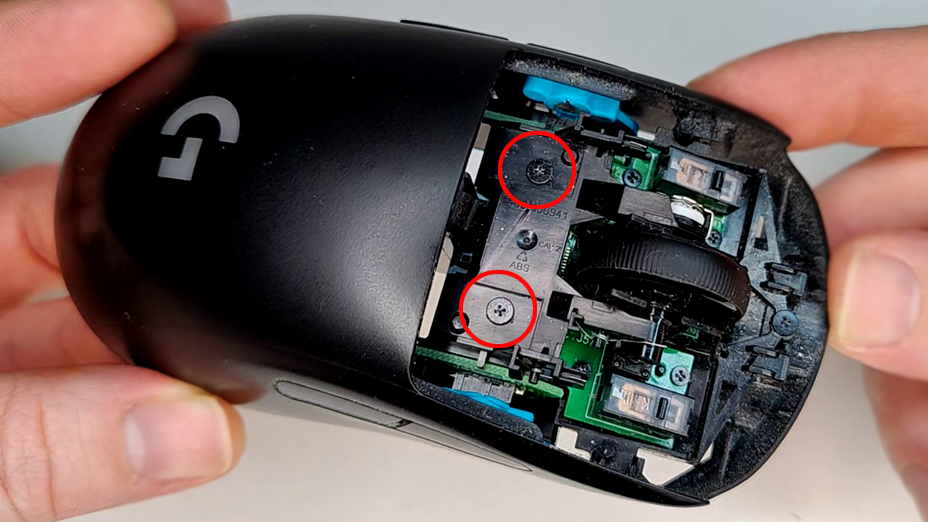
It is possible that when you are opening your mouse first time that the springs get loosen, so here is the image that you can use when you need to check how they were originally.
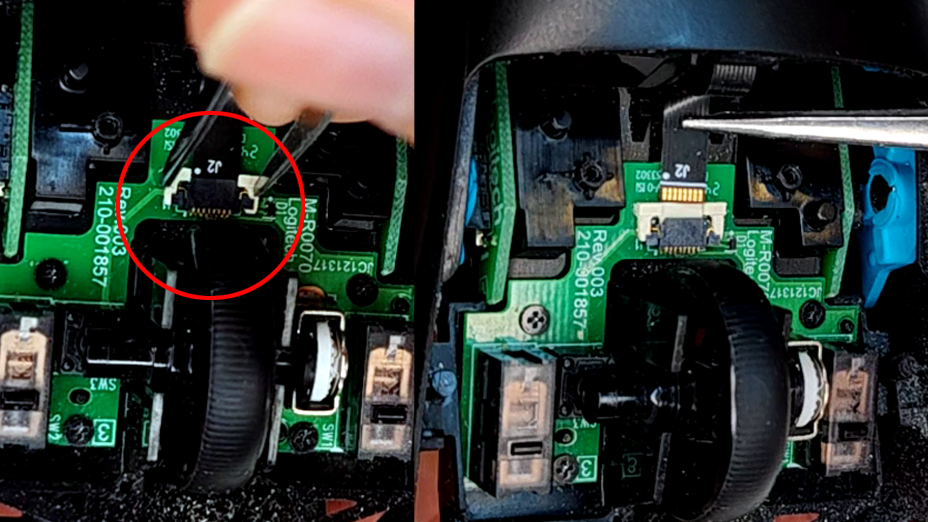
Next you need to open cable holder, and you can use tweezers or small pliers to do that.
There is four screws that you need to unscrew, so that you can remove PCB. You might want to hold your mouse upside down and screw underneath so that screws fall off and don't get sucked by the magnets.
Now you can remove mouse wheel just by pulling it out.
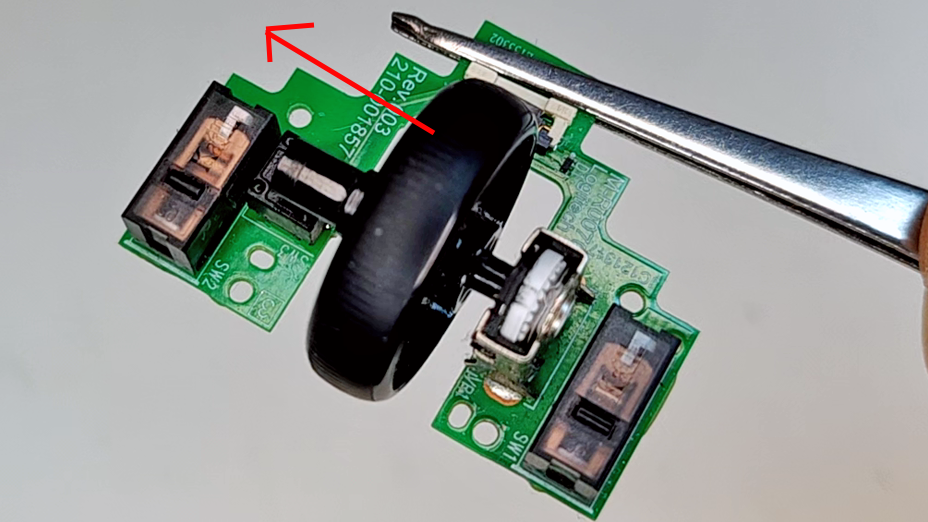
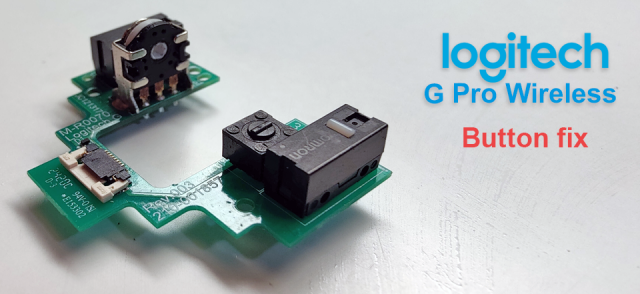
If you are wondering why buttons look different in this photo, it's because this is taken before soldering. So these are original buttons. Left/right click and scroll encoder has to be oriented like in this photo, but square looking middle click works in both orientations.
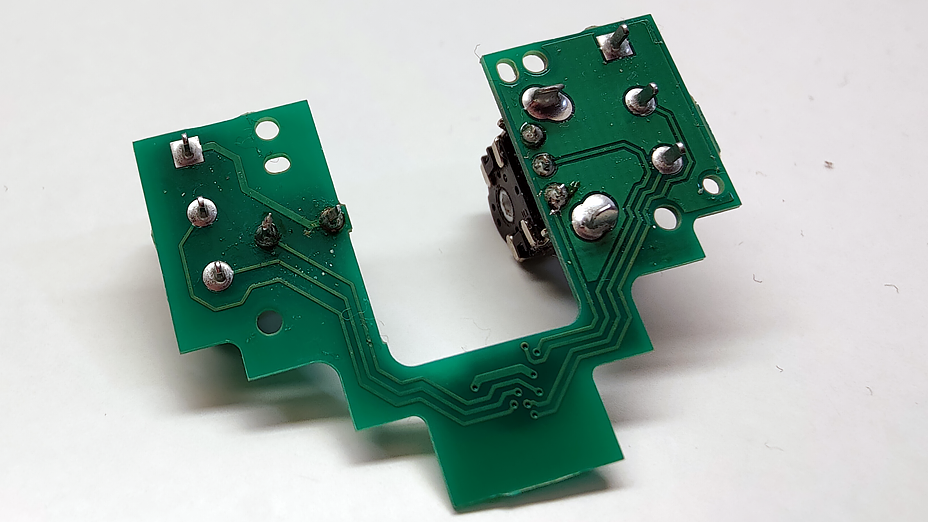
Bottom of the PCB.
Because of the bad lighting of the video there isn't any material of the soldering process. But soldering is universal skill, so you can check any video on Youtube and apply that skill to this. When you are assembling the mouse back to one piece, just follow this article in reverse order.
0 Comments