How to get games to work with Hamachi on Windows 10
And now it's here! How to get games to work with Hamachi on Windows 10! Hamachi doesn’t work? You can’t ping your friends? Some of your friends can see your game, but some don’t? We’ve had all of those mentioned problems, and we managed to get all work with these steps.
This is the third article in the series How to get games work with Hamachi and there hasn't been lot change since last article. One of the biggest change is that LogMeIn is killing free subscription, and it is happening this month. So in the future you have to buy subscription that costs 29usd / year if you want to use Hamachi, and it is thing that is moving people to use Tunngle. But let's cut to chase and show how you get things work in year 2016.
Check out updated article - https://wiretuts.com/playing-old-lan-games-over-internet-using-hamachi-in-2019/
Creating Hamachi network and installing application
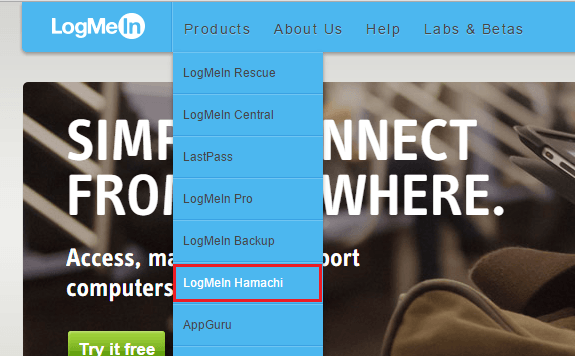
1. Go to https://secure.logmein.com/ and navigate to Products -> LogMeIn Hamachi.
2. Click Try it Free.

3. Create account or log in if you have account.

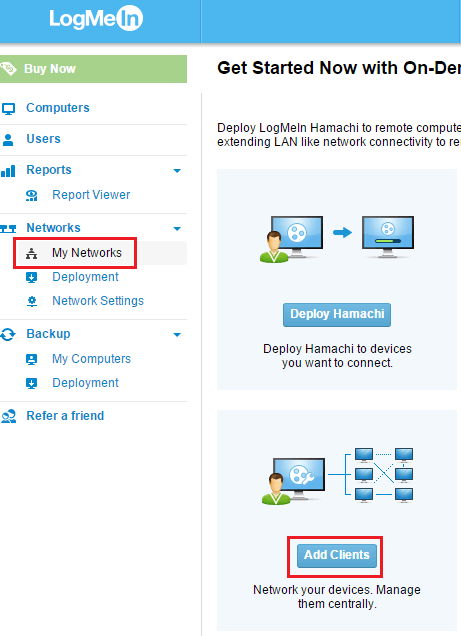
4. Go to My Networks and click Add Clients.
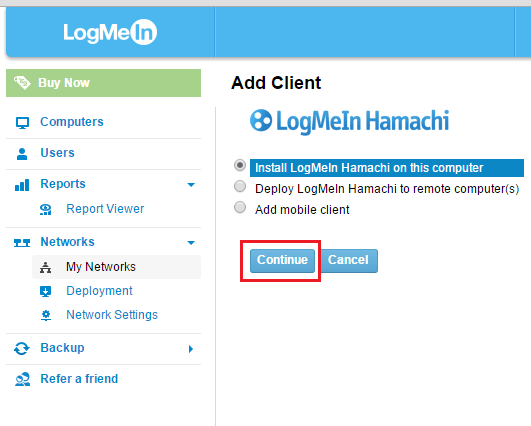
5. Click Continue and yout Hamachi download should start.
6. Go toMy Networks and click Create Networks.

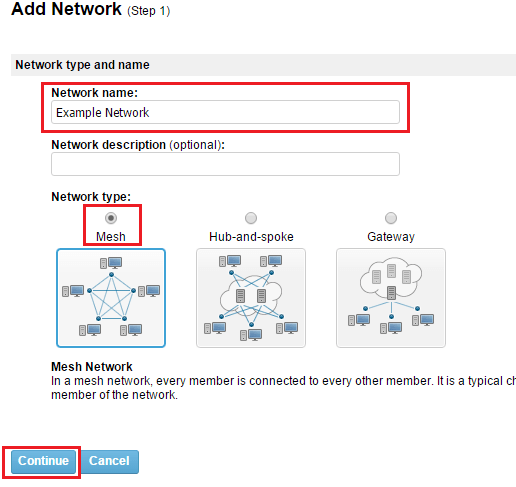
7. Write some network name, select Mesh and click Continue.
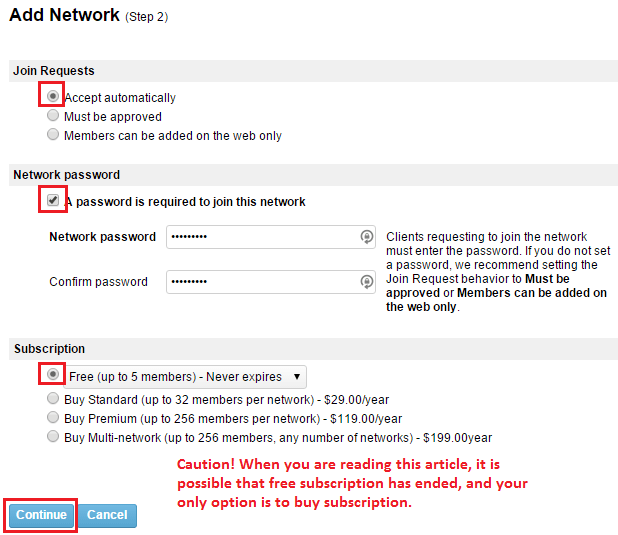
8. Select Accept automatically and A password is required. At this time when i'm writing this, there is still option for Free subscription, but LogMeIn has informed that it is ending on this month (January 2016), so your only option can be to buy sub.
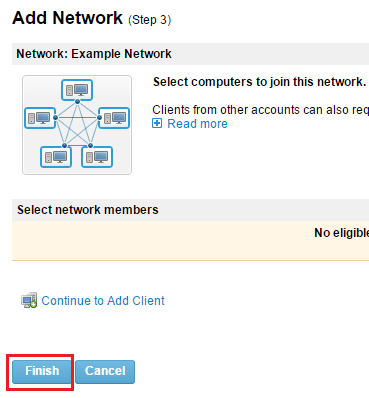
9. Hit Finish.
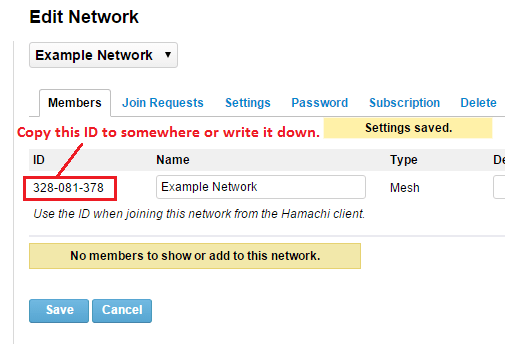
10. Copy network id to notepad or write it down to paper. This is the ID where you all are connecting.
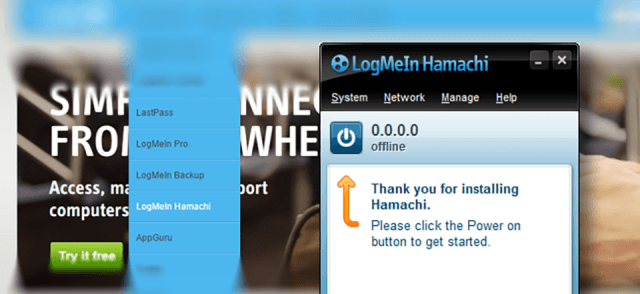
11. Hamachi pages are very slow at times so it is possible that your download hasn't completed yet, so grab a coffee and wait if download isn't complete, but when it finishes -> start hamachi.msi.
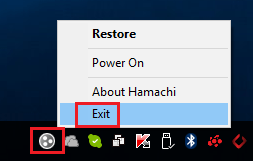
12. Exit Hamachi.

13. Find Hamachi icon from task bar, right click it, and select Exit.
Hamachi adapter tweaks
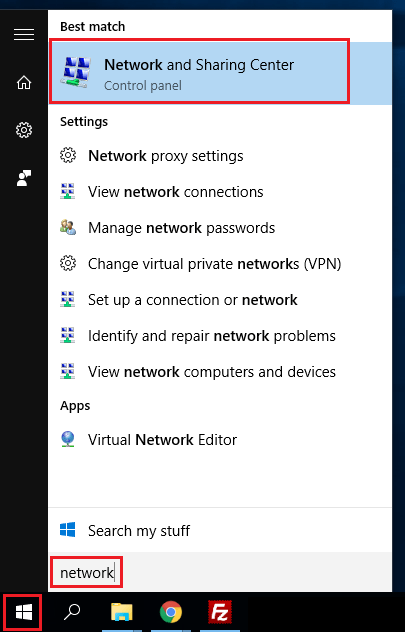
14. Open startup menu and write network and select Network and Sharing center.
15. Click Change adapter settings from left side.

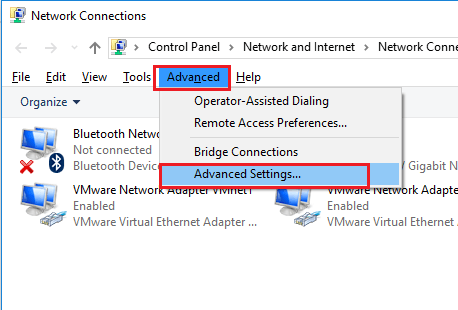
16. If you don't have this menu on top, hit Alt key from keyboard and it appears. Click Advanced -> Advanced Settings.
17. Select Hamachi from list and move it up with up arrow, and do same thing to both Internet Protocol Version 4 on Bindings for Hamachi -list and hit Ok.

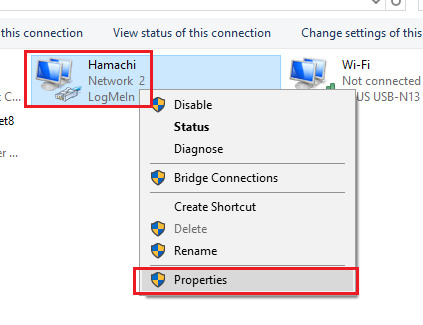
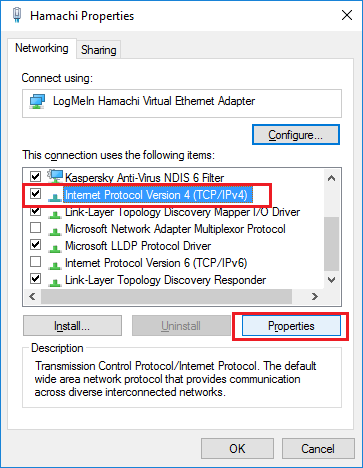
18. Right-click Hamachi on network connections and select Properties.
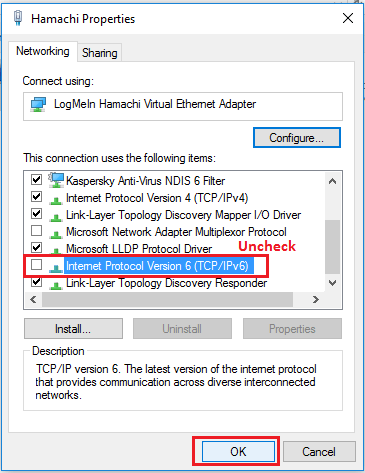
19. Uncheck IPv6.
Joining into Hamachi network
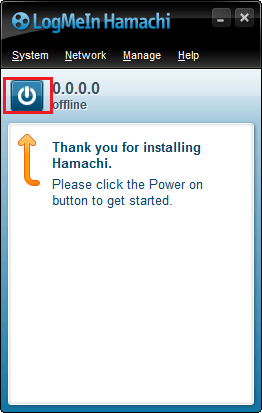
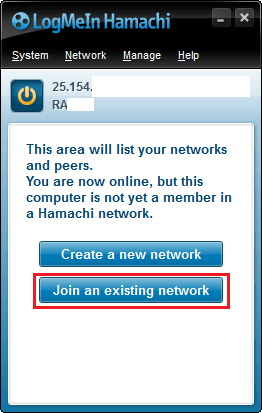
20. Start Hamachi.
21. Hit Power icon.
22. Log in with same account that you used in LogMeIn website.
23. Hit Join an existing network.
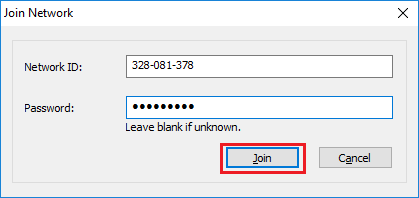
24. This is the point where you need that Network ID and password what you created earlier in LogMeIn website. After you have write them, click Join.
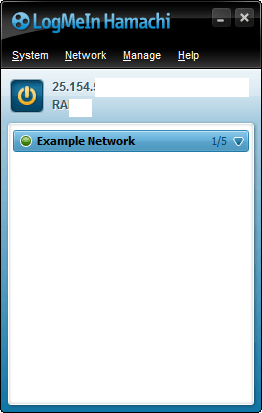
25. Aaaand there you have it! You are now connected to your Hamachi network.
Some people may think that "So should all players do these all steps?" and the answer is no. It is enough if one is doing all these steps and other players has to do all steps but no network creation steps. Player who made network, gives ID and password to other players.
Problem situations
Can't see or connect game server that is hosted on Hamachi network
1. Go toNetwork and Sharing center.
2. Right click Hamachi -adapter and select Properties.

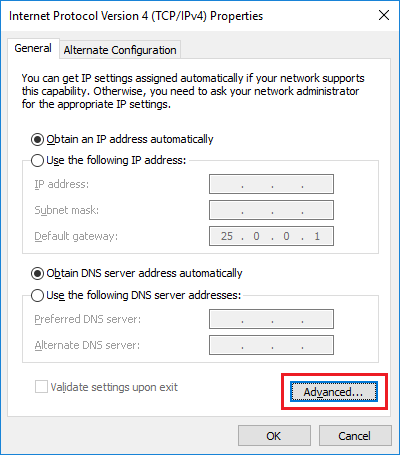
3. Select IPv4 and click Properties.
4. Select Advanced.
5. Uncheck Automatic metric and change Interface metric to 1and hit Ok.

Remember that you have to reset your adapter, so close your Hamachi completely and start it again, or if you want to be sure, you can just reboot computer.
Hamachi won't start
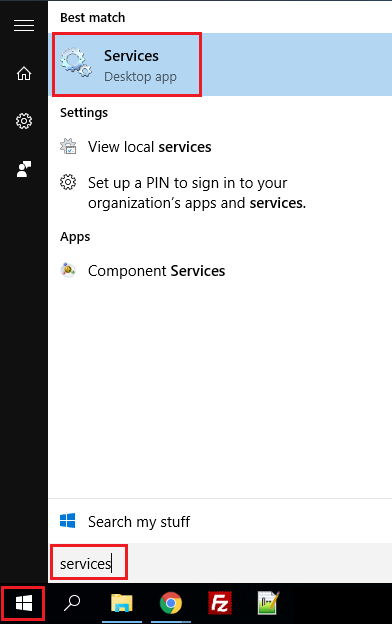
1. Hit start menu icon and write services and click Services.
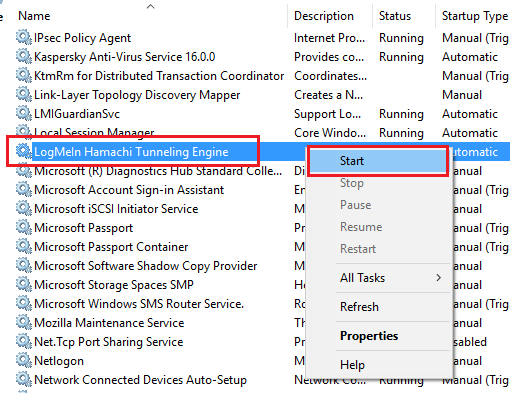
2. Find LogMeIn Hamachi Tunneling Engine, right-click it and select Start.
10 Comments