Playing old LAN games over internet using Hamachi in 2019

It's time to learn how you can play old LAN games over internet using Hamachi. LogMeIn Hamachi is a virtual private network (VPN) application. It is capable of establishing direct links between computers that are behind Network address translation (NAT) firewalls. When Hamachi works, it works like butter, but it can be a real headache to get it work. So i suggest that before you start to mess with Hamachi, check out this GameRanger article. GameRanger supports over 700 old games and it's much easier to setup.
Installing Hamachi on Windows 10
1. Go to https://www.vpn.net/ and click Download now.

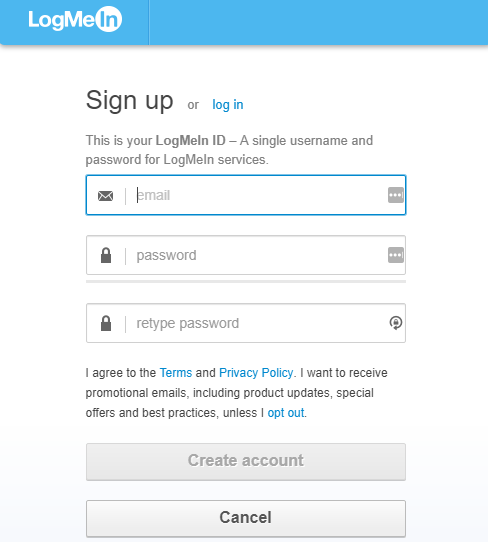
2. While you wait Hamachi to download, go to Sign up (Referral link). Every Hamachi user have to have Hamachi account so they can join to your Hamachi network.
3. After you have created your account start Hamachi installer.
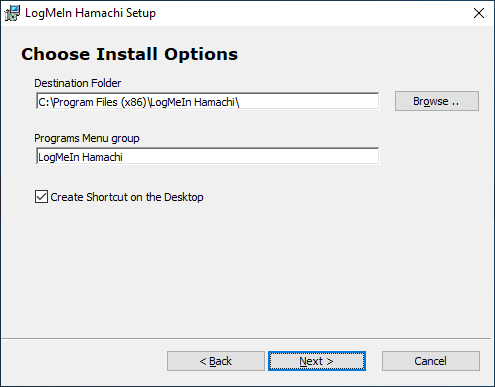
4. Really basic installer. Next next next next finish.
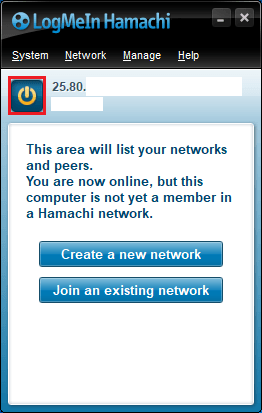
5. Launch Hamachi after installation.

6. Hit power button from Hamachi, it should now generate your Hamachi IP address.
Changing Hamachi network priority (Interface Metric)
We need to change Hamachi interface priority to highest so old games will get Hamachi IP, not your normal LAN interface ip. Priority is called as Interface Metric in Windows 10. It's debatable if this is necessary or not, because for some everything will work without doing this, but if every "party member" setups Hamachi as same, it will have better change to work as intended.
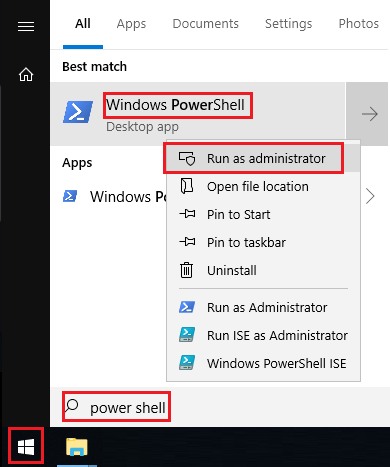
1. Open windows start menu and write "power shell". Right click icon and select Run as administrator.
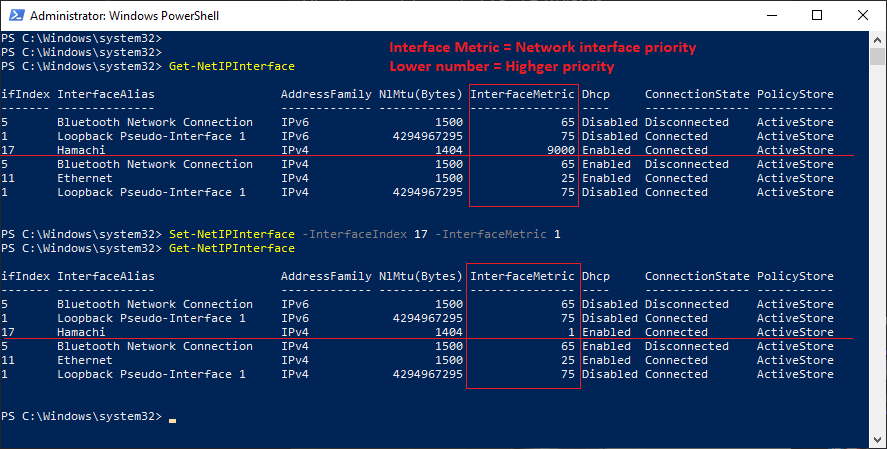
2. Write Get-NetIPInterface and hit enter. You should see Hamachi interface there and by default Interface Metric is 9000. We wanna change Interface Metric to number that will be smallest on the list, so everyhing below 25 should work.
In my example image Hamachi interface index is 17. You can see it in the left side before Hamachi text (ifIndex). So i would write Set-NetIPInterface -InterfaceIndex 17 -InterfaceMetric 1 after that write again Get-NetIPInterface
so you can see that InterfaceMetric has changed.
After you have changed Interface Metric reboot your computer, or you can reboot your computer when you have finished making all the changes mentioned in this article.
You can paste text to Powershell with mouse right click.
Changing Hamachi to IPv4 only
This is also step that we can debate about, but there has been situations where someone is getting IPv6 IP address and it has messed things up. So it's just easier to force Hamachi to use only IPv4 addresses and there will be less headache.
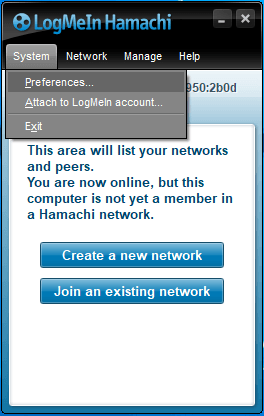
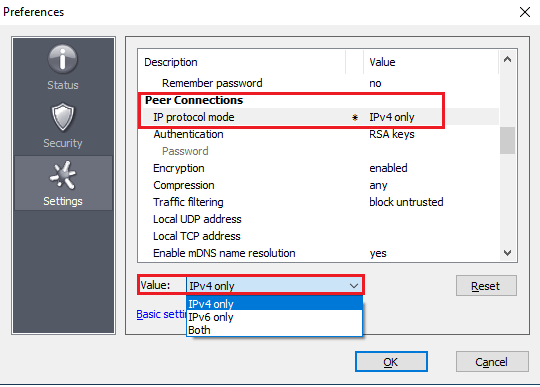
1. Open Hamachi and go to System > Preferences.
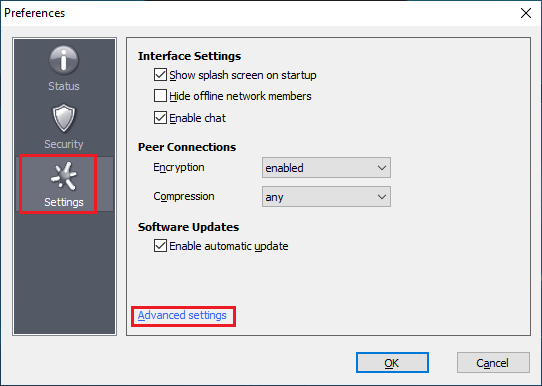
2. Go to Settings > Advanced Settings.
3. Scroll down untill you see IP protocol mode and change it to IPv4 only.
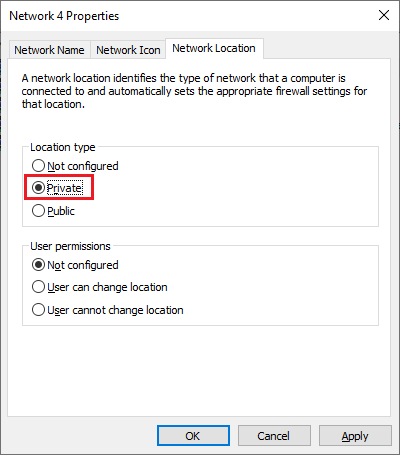
Changing Hamachi network location
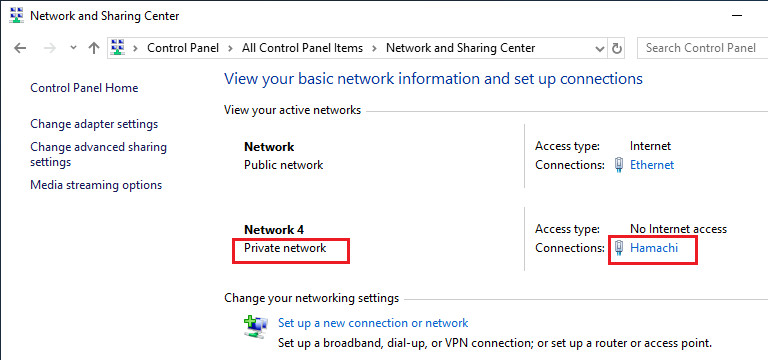
You have to do this ONLY if your Hamachi network location isn't already Private network. So if Hamachi network already belongs to Private network, skip this steps.
1. Go to Control Panel > Network and Sharing Center and check that your Hamachi network belongs to Private network. If your Hamachi network belongs to Public network, it's better to change it.
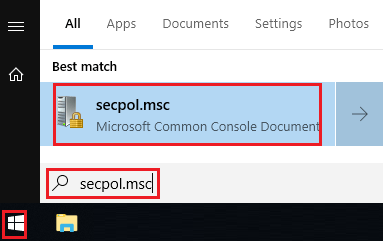
2. Open windows start menu and write secpol.msc and click best match link.
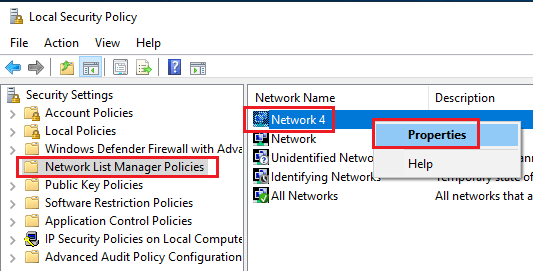
3. Open Network List Manager Policies and find your Hamachi network and open Properties.
4. Go to Network Location tab and change location type to Private.
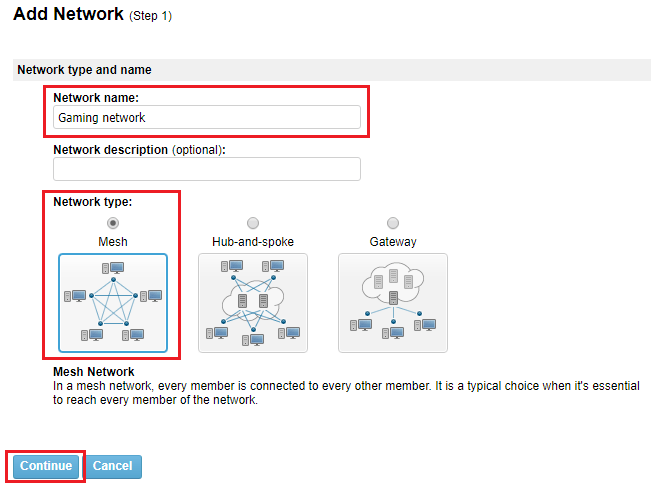
Creating Hamachi network
It is enough that only one user is creating the network, and all other participants joins there.
1. Login to Hamachi website (Link) with your account and navigate to Networks > My Networks and click Add Network.

2. Give your network a name and make sure that Mesh is selected.
3. You can put these settings how you like. If you want to have more than 5 members in your Hamachi network, you have to buy subscription. You can get 33% off by clickin this link: http://ssqt.co/mcfbqsn
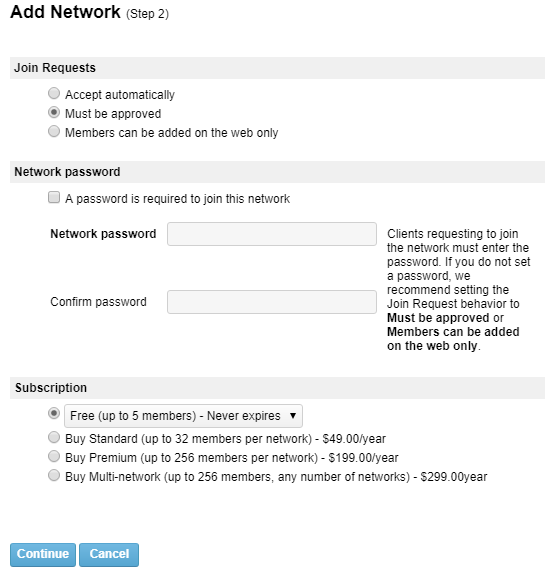
4. Click Finish.
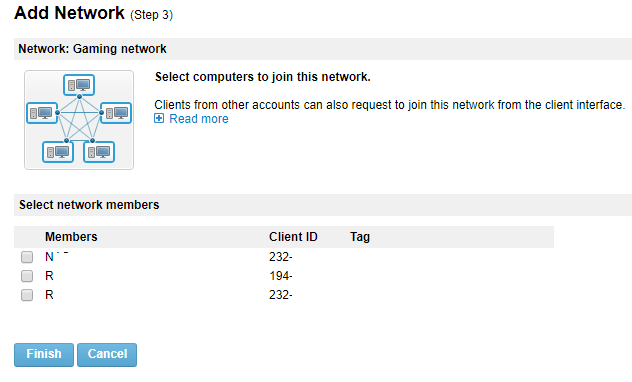
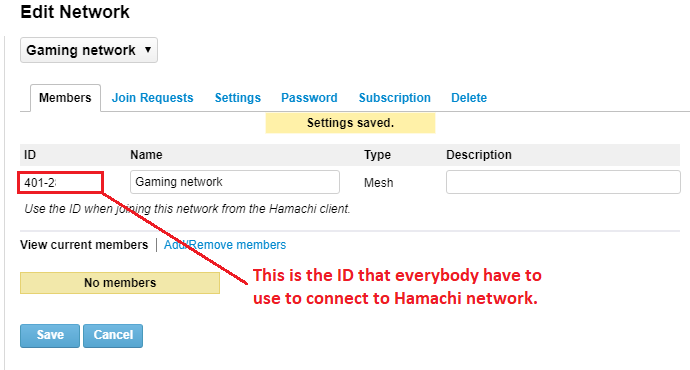
5. Copy your network ID and send it to every party member.
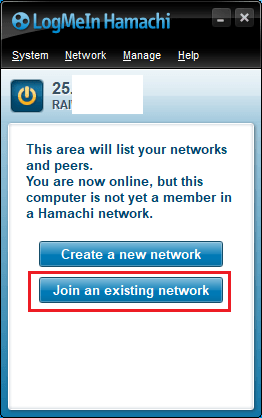
6. Open Hamachi and click Join an existing network.
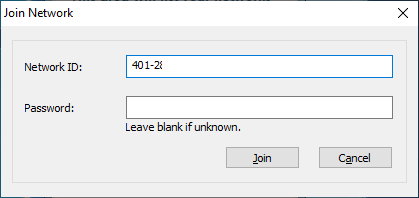
7. Paste your network ID and write your password if you are using one.
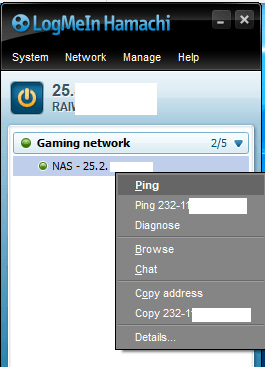
8. When everybody has joined to newly created network you should see them on the list. If everything is working as it should, you can ping your friends and your friends can ping you. Also if someone is sharing files in network, you can see them with Browse.
Windows Defender Firewall settings for Hamachi
If you are using Windows Defender Firewall and it is enabled, it is good to make sure that Hamachi network traffic is allowed.
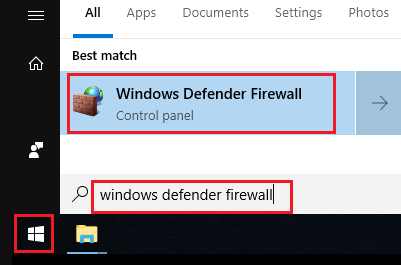
1. Open start menu and write windows defender firewall and open best match link.
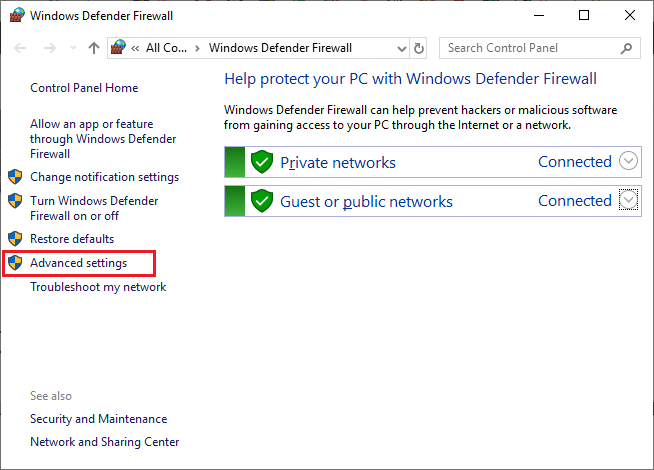
2. Open Advanced settings.
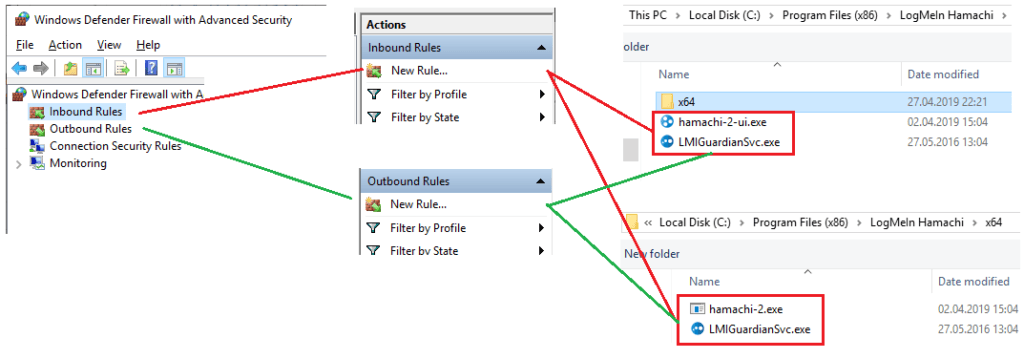
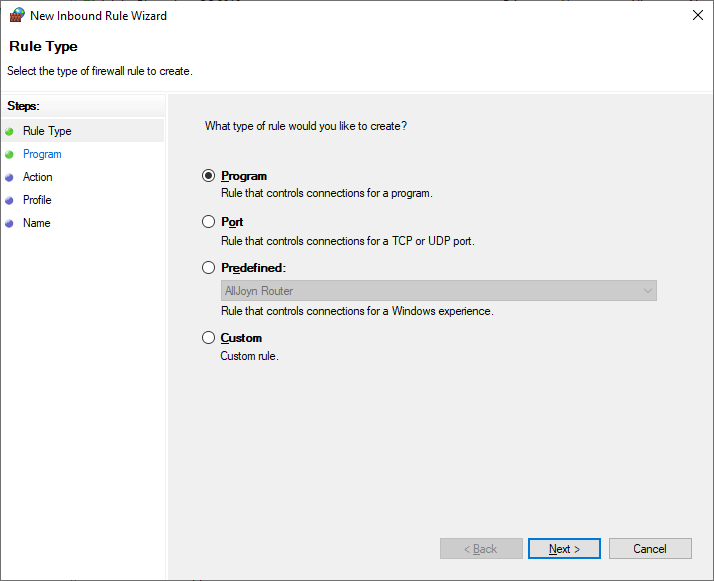
3. Add all 4 Hamachi executables to Inbound and Outbound rules. So you have to create overall 8 rules. 4 Inbound rule and 4 Outbound rule.
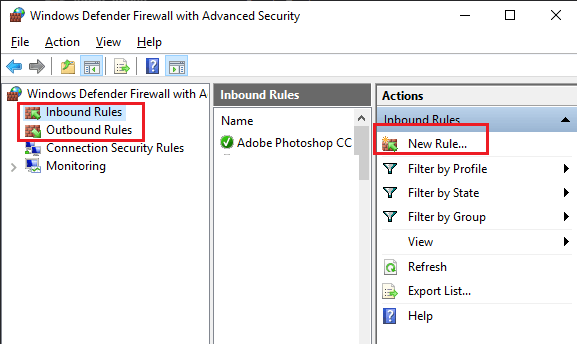
4. Select Program and hit Next.
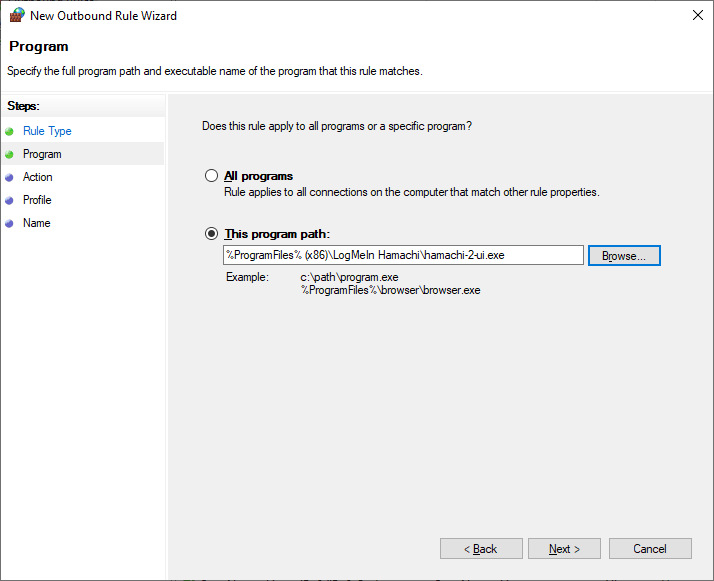
5. Find your Hamachi installation dir and executables.
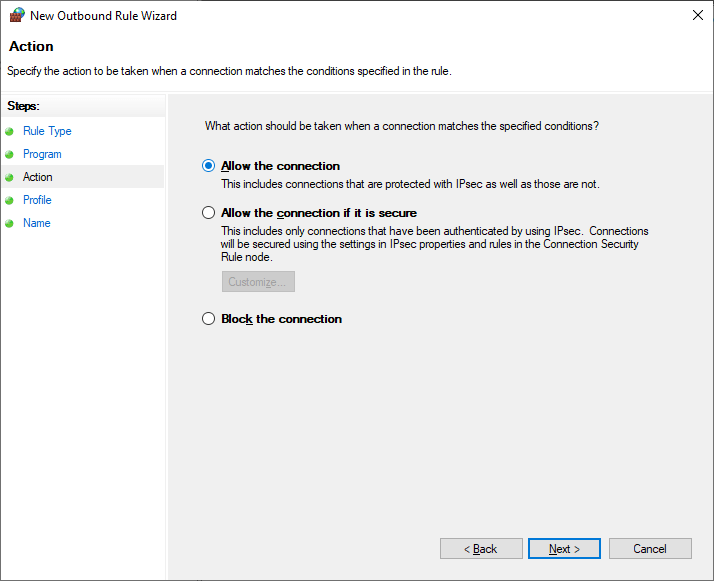
6. Select Allow the connection.
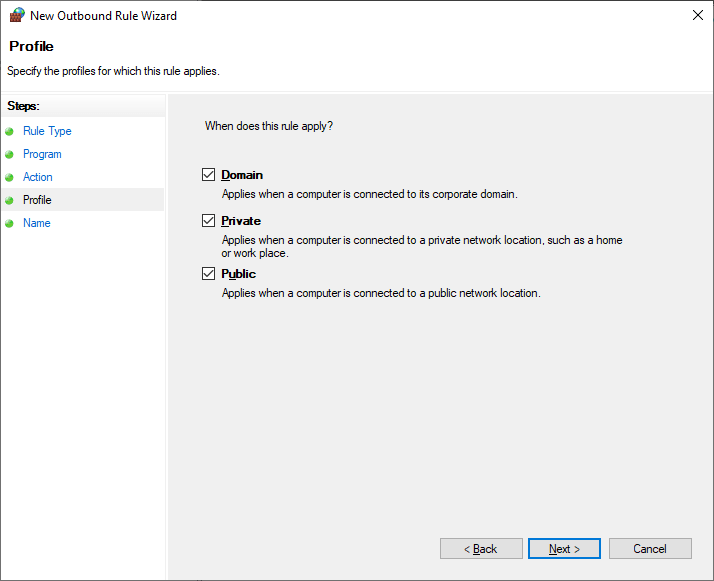
7. Keep everything default (selected).
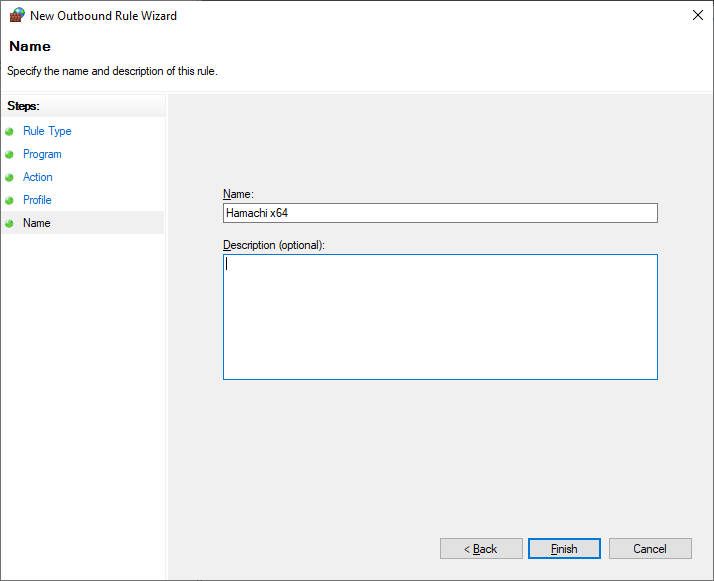
8. Give unique names to your rules. Example Hamachi, Hamachi x64, Hamachi Guardian, Hamachi Guardian x64
Port forwarding for Hamachi
If you do not have public IP and your PC is behind NAT you have to apply port forwarding settings to your modem/router. How to do port forwarding to your modem/router depends what model you have.
Server Connectivity
TCP 12975 (initiator port)
TCP 32976 (session port)
If the above ports cannot be used to achieve a connection, Hamachi will try again using
TCP 443 (SSL)
Peer Connectivity
If UDP direct connectivity cannot be established, Hamachi will try to initiate a relayed UDP connection. This is done with the target of:
UDP 17771 (relay connection port)
If Hamachi won't start
1. Hit start menu icon and write services and click Services.
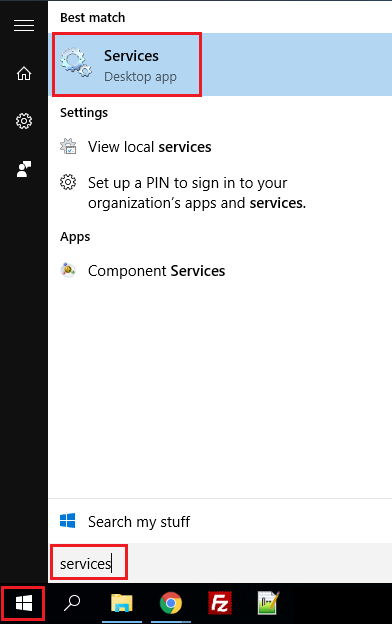
2. Find LogMeIn Hamachi Tunneling Engine, right-click it and select Start.

8 Comments