Installing Mopidy music server on Raspberry Pi
In this tutorial im teaching you how to install Mopidy music server on Raspberry Pi. Mopidy can stream music from 20 different sources including Youtube, Spotify, Soundcloud and local files. Full list of available extensions can be found here. So what is the purpose of Mopidy? You connect your Raspberry Pi directly to your speaker/hifi system with 3.5mm connector, HDMI or with bluetooth, and then you can control Mopidy with browser to play music from different sources. We are using Iris extension that adds browser control for Mopidy with multi user support. For example you could be in lan party and every member could add songs to queue from their own computer.
What are we installing?
- Mopidy on Raspberry Pi 3/4 that is running latest version of Raspberry Pi OS Lite (December 2nd 2020).
- Mopidy-Youtube source extension. This extension works without Youtube Premium subscription.
- Mopidy-Spotify source extension. You have to have active Spotify subscription for this extension to work.
- Mopidy-Iris web extension. Iris adds way to control Mopidy with browser.
- Samba file sharing. With Samba you can share folder from Raspberry Pi to your LAN, so that you can drag-and-drop audio files for Mopidy to play.
(You don't have to install all the mentioned extensions. Make your changes along the way.)
Install Mopidy with Youtube, Spotify and Iris extension
1. If you are not using Raspberry Pi locally, then connect to it using SSH with program like PuTTy. Here is tutorial how to enable SSH in Raspberry Pi OS: Enabling SSH on Raspberry Pi OS for remote use.

2. First we need to add archive’s GPG key and APT repo to package sources by running these two commands.
wget -q -O - https://apt.mopidy.com/mopidy.gpg | sudo apt-key add -
sudo wget -q -O /etc/apt/sources.list.d/mopidy.list https://apt.mopidy.com/buster.list
3. Update local repositories.
sudo apt update
4. Install Mopidy, pip for Python 3, and libspotify for Spotify. If you are not installing Spotify extension, you don't need libspotify.
sudo apt install mopidy python3-pip libspotify-dev
5. Use pip to install extensions for Mopidy. If you don't need Youtube or Spotify extension, make your changes.
sudo python3 -m pip install Mopidy-Iris Mopidy-Spotify Mopidy-Youtube
Configuring Mopidy and the extensions
1. Open Mopidy config file for editing. We are running Mopidy as service, so we have to edit this config file.
sudo nano /etc/mopidy/mopidy.conf
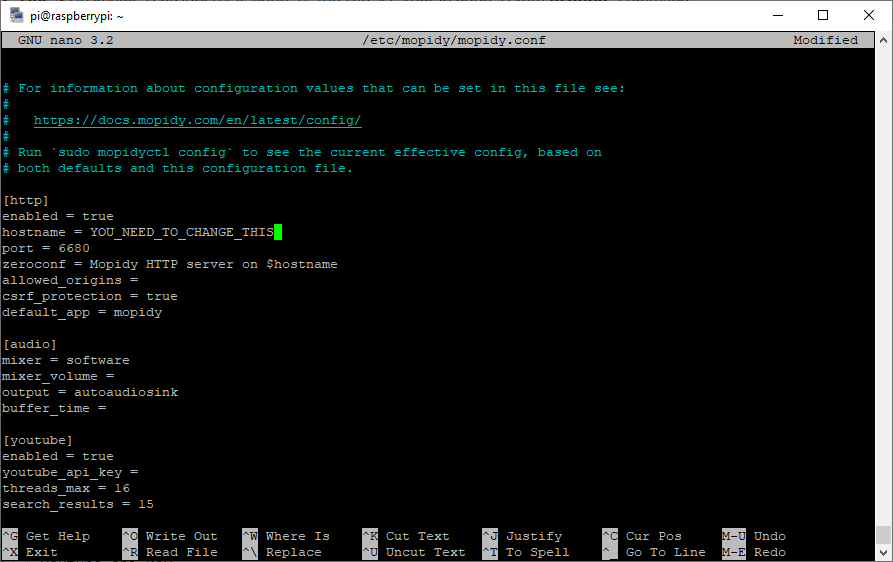
2. Here is the full default config. I suggest that you copy the config to Notepad or any text editor of your choice, so that is is easier to edit the values, but you can also copy&paste it straight to mopidy.conf and edit there.
- Line 3 Hostname is Raspberry IP address. You can see your ip address with ifconfig -command.
- Line 30 & 31 Spotify username and password
- Line 32 & 33 Spotify client_id and client_secret. You can get them from here using your Spotify authentication: https://mopidy.com/ext/spotify/
- Line 48 & 49 Optional Iris language codes. If you want that Iris is localized with your locale.
[http]
enabled = true
hostname = YOU_NEED_TO_CHANGE_THIS
port = 6680
zeroconf = Mopidy HTTP server on $hostname
allowed_origins =
csrf_protection = true
default_app = mopidy

[audio]
mixer = software
mixer_volume =
output = autoaudiosink
buffer_time =

[youtube]
enabled = true
youtube_api_key =
threads_max = 16
search_results = 15
playlist_max_videos = 20
api_enabled = false
autoplay_enabled = false
strict_autoplay = false
max_autoplay_length = 600
max_degrees_of_separation = 3

[spotify]
enabled = true
username = YOU_NEED_TO_CHANGE_THIS
password = YOU_NEED_TO_CHANGE_THIS
client_id = YOU_NEED_TO_CHANGE_THIS
client_secret = YOU_NEED_TO_CHANGE_THIS
bitrate = 160
volume_normalization = true
private_session = false
timeout = 10
allow_cache = true
allow_network = true
allow_playlists = true
search_album_count = 20
search_artist_count = 10
search_track_count = 50
toplist_countries =

[iris]
enabled = true
country = NZ
locale = en_NZ
spotify_authorization_url = https://jamesbarnsley.co.nz/iris/auth_spotify.php
lastfm_authorization_url = https://jamesbarnsley.co.nz/iris/auth_lastfm.php
genius_authorization_url = https://jamesbarnsley.co.nz/iris/auth_genius.php
data_dir = $XDG_DATA_DIR/iris

[core]
cache_dir = /var/cache/mopidy
config_dir = /etc/mopidy
data_dir = /var/lib/mopidy
max_tracklist_length = 10000
restore_state = false

[logging]
verbosity = 0
format = %(levelname)-8s [%(threadName)s] %(name)s %(message)s
color = false
config_file =

[proxy]
scheme =
hostname =
port =
username =
password =

[file]
enabled = true
media_dirs =
  $XDG_MUSIC_DIR|Music
  ~/|Home
excluded_file_extensions =
  .directory
  .html
  .jpeg
  .jpg
  .log
  .nfo
  .pdf
  .png
  .txt
  .zip
show_dotfiles = false
follow_symlinks = false
metadata_timeout = 1000

[m3u]
enabled = false
base_dir =
default_encoding = latin-1
default_extension = .m3u8
playlists_dir =

[softwaremixer]
enabled = true

[stream]
enabled = true
protocols =
  http
  https
  mms
  rtmp
  rtmps
  rtsp
metadata_blacklist =
timeout = 5000
3. When your config is ready in mopidy.conf, you can save it by pressing [Ctrl] + X then y and then [Enter].
4. Check that your config is in effect and that there is no errors by running this command.
sudo mopidyctl config
Running Mopidy
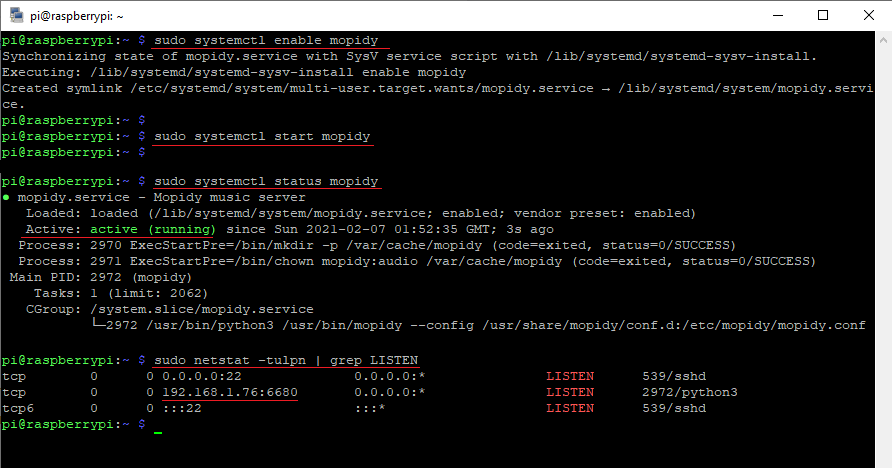
1. Enable Mopidy service. This also makes Mopidy to start automatically on boot.
sudo systemctl enable mopidy
2. Start Mopidy service.
sudo systemctl start mopidy
3. Check that Mopidy is running and that there is no errors.
sudo systemctl status mopidy
4. Check that Mopidys port is listening (Default is 6680). It might take moment untill you see it, so you might have to run this command multiple times.
sudo netstat -tulpn | grep LISTEN
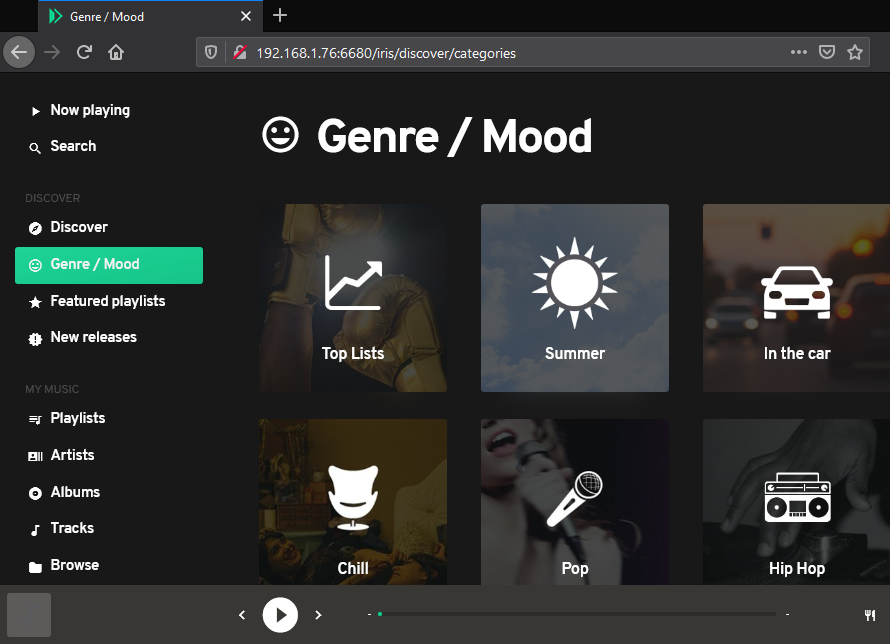
5. Try to access Mopidy with your browser. You should have access both with hostname and ip address (http://192.168.1.50:6680 | http://raspberry:6680). Important! If you are using VPN, it is possible that it blocks your access to your Mopidy that is running on your LAN.
Commands for Mopidy
- sudo nano /etc/mopidy/mopidy.conf - Mopidy config editor.
- sudo mopidyctl config - Shows current config.
- sudo systemctl enable mopidy - Enables Mopidy service, and it starts automatically on boot.
- sudo systemctl enable mopidy - Disables Mopidy service.
- sudo systemctl start mopidy - Start Mopidy service.
- sudo systemctl stop mopidy - Stop Mopidy service.
- sudo systemctl restart mopidy - Restart Mopidy service.
- sudo systemctl status mopidy - Shows current status of Mopidy service and possible errors.
Drag and drop audio files to Mopidy over LAN
If you want to drag-and-drop music files over LAN to Mopidy for local play, we can do that by installing Samba to Raspberry Pi and then share folder using that.

1. Install samba with sudo apt install samba
2. When installer asks about DHCP and WINS. Choose No.
3. Create folder that you are going to share over LAN mkdir /home/pi/music
4. Open samba config file for editing by running sudo nano /etc/samba/smb.conf
5. Scroll all the way to the bottom and add these lines. If you want that anybody can access your music folder without username and password, change public to yes. After that save and exit [Ctrl] + W and Y and [Enter].
[music]
path = /home/pi/music
writeable=Yes
create mask=0777
directory mask=0777
public=no
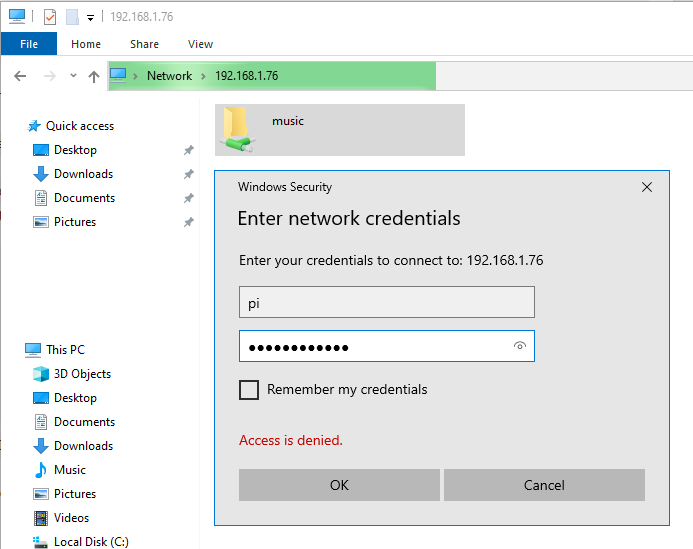
6. Add user pi to Samba and set your password sudo smbpasswd -a pi
7. Restart Samba by running sudo systemctl restart smbd

8. Open Mopidy config file sudo nano /etc/mopidy/mopidy.conf and add your music directory to the media_dirs under the [file] category. Then save and exit [Ctrl] + W and Y and [Enter].
[file]
enabled = true
media_dirs =
  /home/pi/music|Music
excluded_file_extensions =
  .directory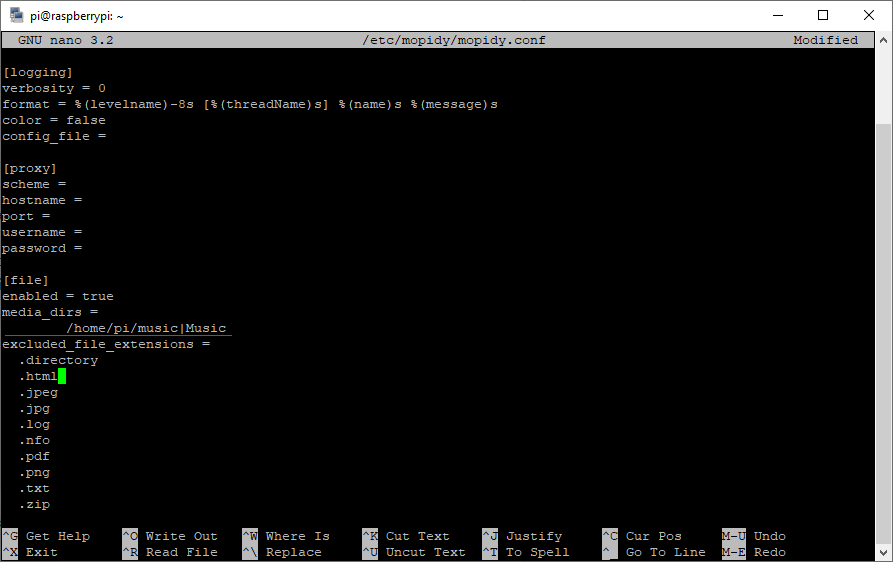
9. Restart Mopidy sudo systemctl restart mopidy
10. Now you should have access to your newly shared folder over the LAN, and you can access that folder with ip address or with hostname.
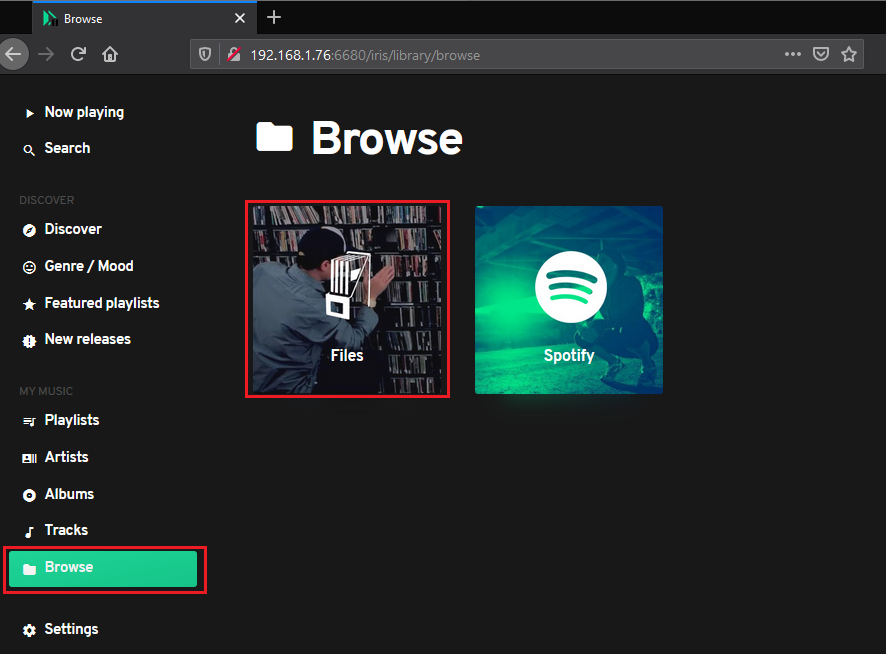
11. You can play local music files from Browse > Files.
Optional. If you don't have permission to write in your music folder, then you can manually change directory permissions by running this chmod 777 /home/pi/music
Low volume level with Mopidy?
If your volume level is really low even if you max out the volume, check this tutorial: Fix low volume level on Raspberry Pi
Play audio through bluetooth speaker with Mopidy
If you want to connect Mopidy to bluetooth speaker, first you need to connect bluetooth speaker to Raspberry Pi: Connecting bluetooth audio device to Raspberry Pi. After you have completed that tutorial you can connect Mopidy to bluetooth speaker sink: Connect Mopidy to bluetooth speaker on Raspberry Pi.
0 Comments