How to get games to work with Hamachi on Windows 8

Finally here! How to get games to work with Hamachi on Windows 8! Hamachi doesn't work? You can't ping your friends? Some of your friends can see your game, but some don't? We've had all of those mentioned problems, and we managed to get all work with these steps.
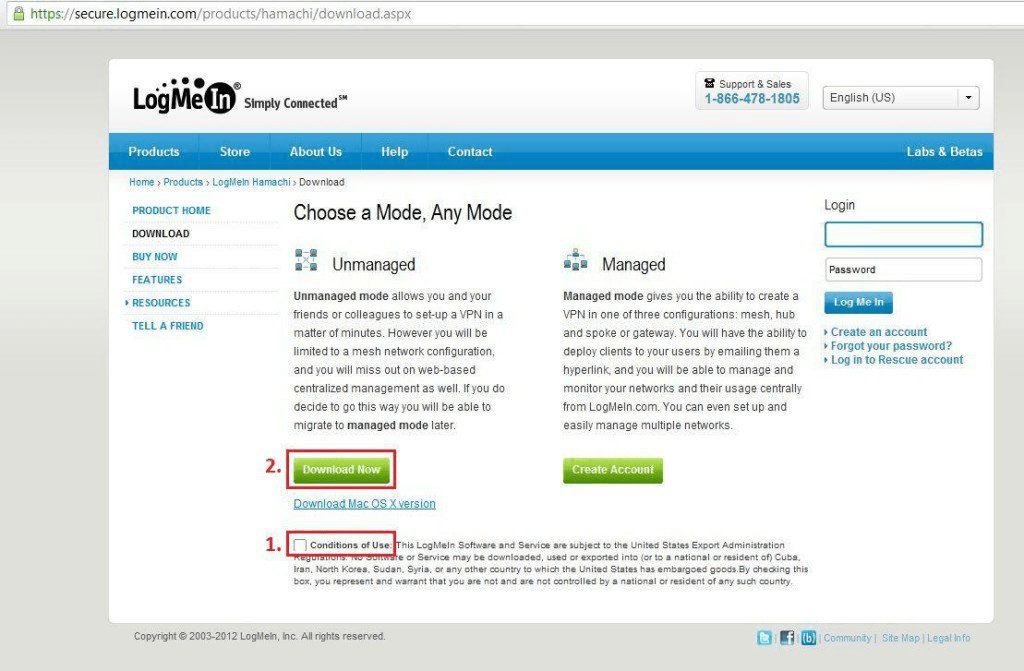
1. Go to -> Hamachi download page . Accept conditions and hit "Download Now".
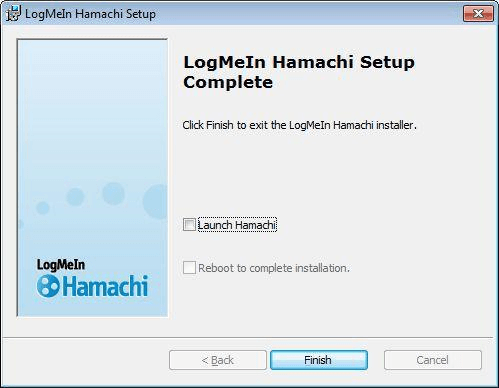
2. Start hamachi.msi
3. After installation, DO NOT launch Hamachi yet.
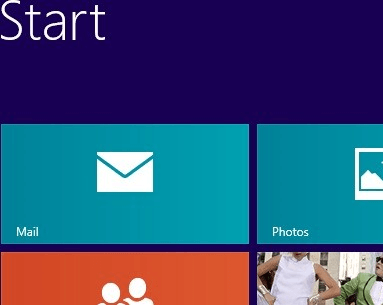
4. Open Metro view
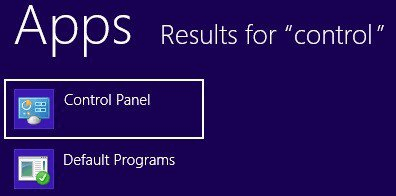
5. Do not click anything, just type control with your keyboard, and search will open automatically.
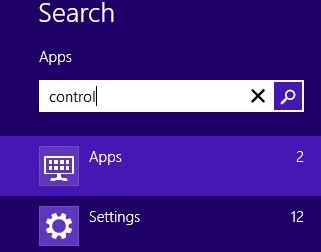
6. Select Control panel from search results.
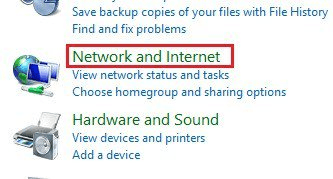
7. Click Network and Internet.
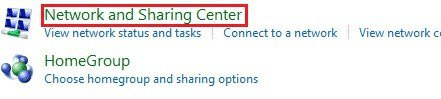
8. Click Network and Sharing center.
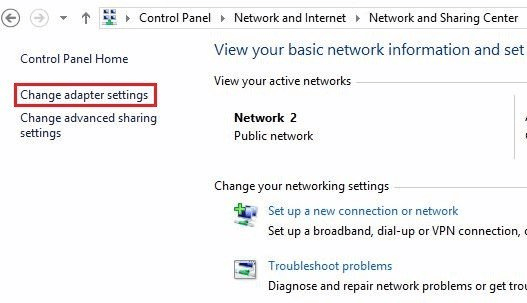
9. Click Change adapter settings from left panel.
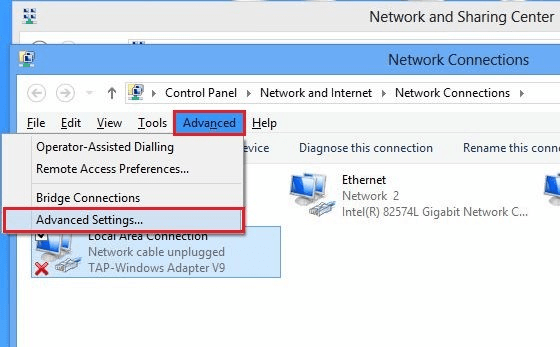
10. Press Alt key from keyboard and hidden menu pops up. Click Advanced -> Advanced Settings.
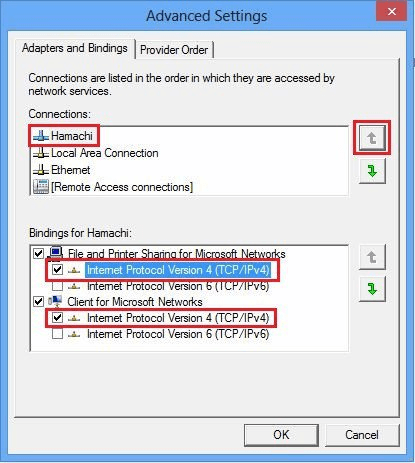
11. Select Hamachi from list and press upper arrow until Hamachi is on the top of the list. Then select TCP/IPv4 from bindings for Hamachi list.
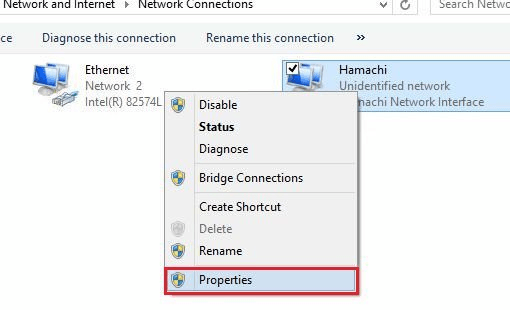
12. Right click Hamachi adapter and select Properties.
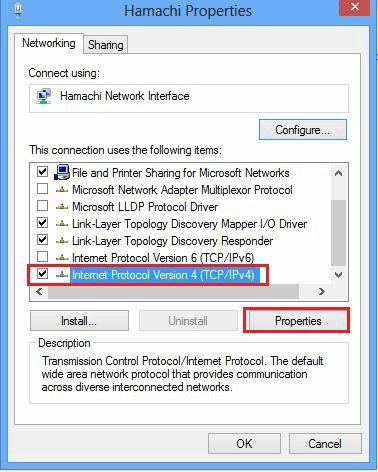
13. Select TCP/IPv4 from list and click Properties.
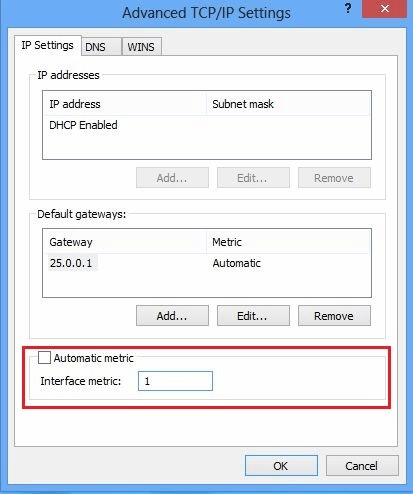
14. Click Advanced.
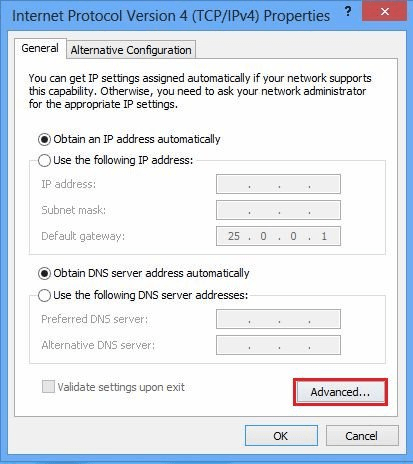
15. Uncheck automatic metric and write 1 to interface metric.
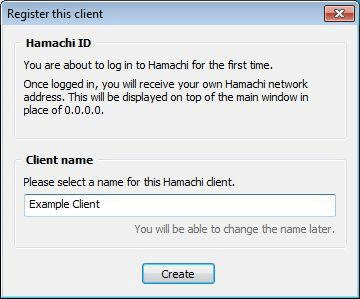
16. Start Hamachi, and hit Power button.

17. Register your client.
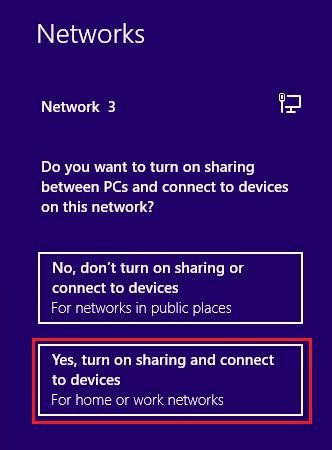
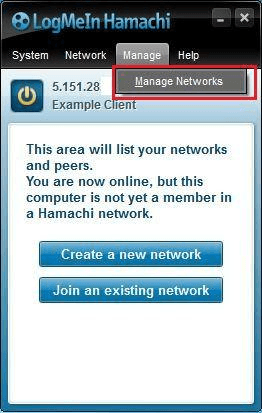
18. This should pop up when you are connected. Click Yes, turn on sharing and connect to devices.
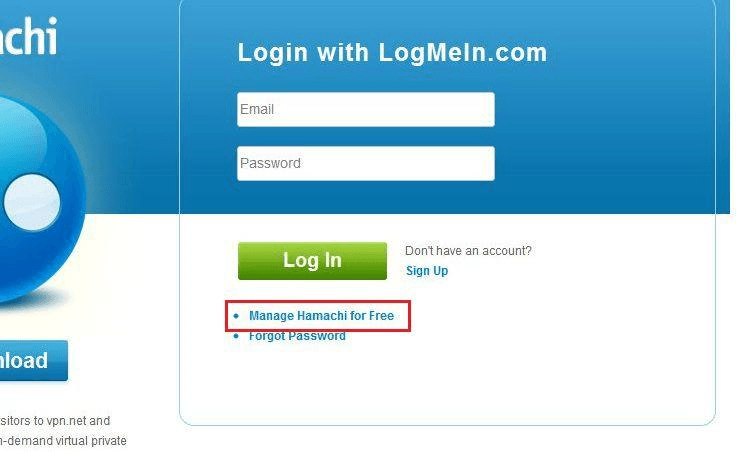
19. Go to Manage -> Manage Networks.
20. You should see LogMeIn website in front of you. Click Manage Hamachi for Free.
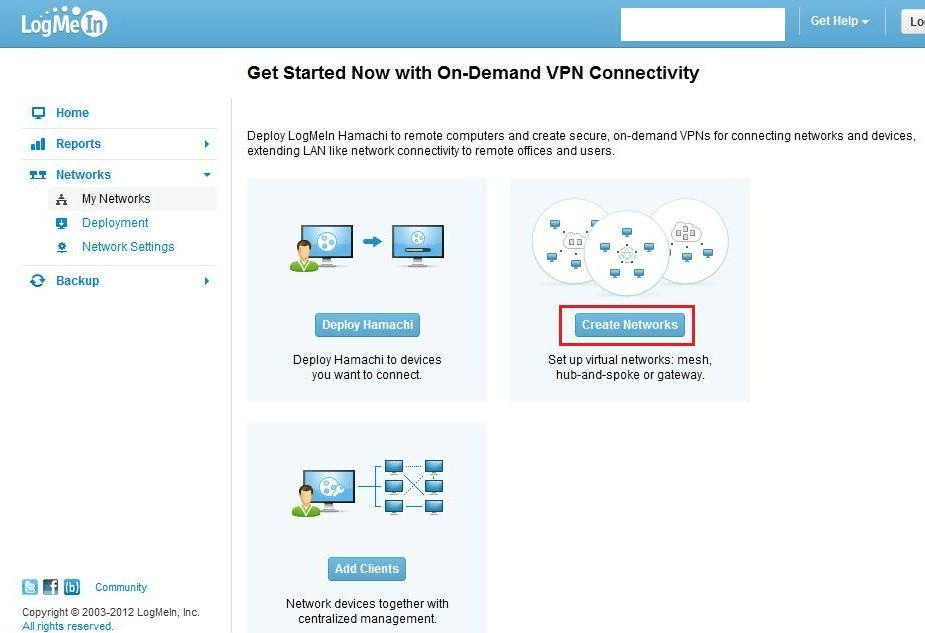
21. Register for free account.

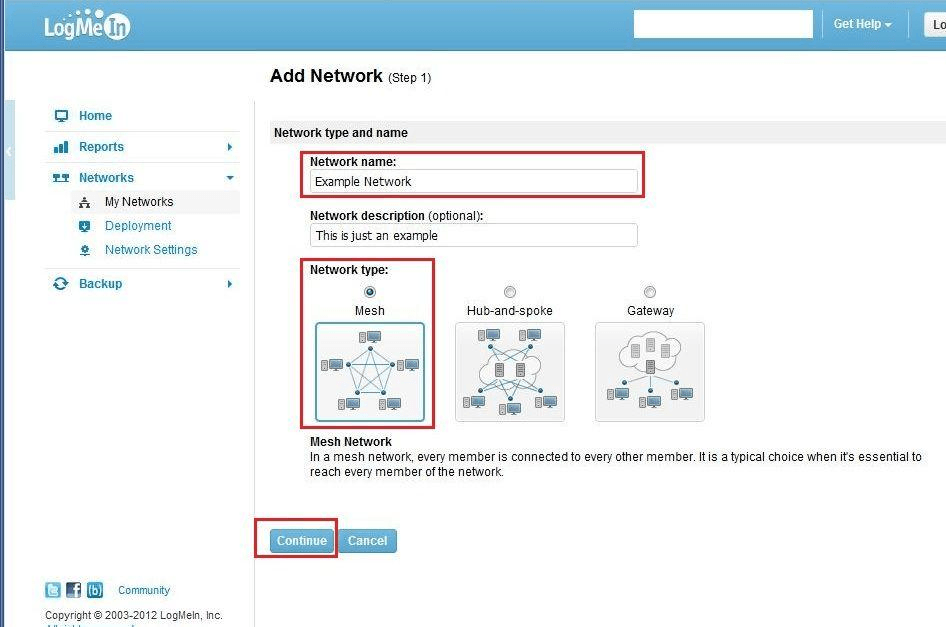
22. Click Create Networks
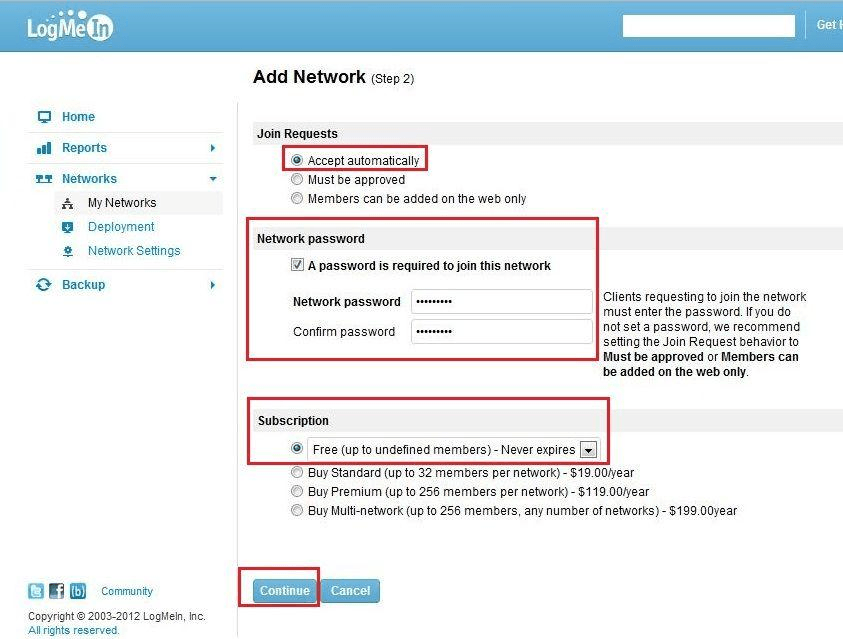
23. Give name to your network and be sure that your network type is Mesh. Click continue.
24. I use "Accept automatically" setting join requests, so i don't have to accept every user that joins to my network. If you want to be sure that only your friends can connect to your network, select "Must be approved".
Network password is that password that you give to your friends, so they can join to your network. Select free subscription and hit Continue.
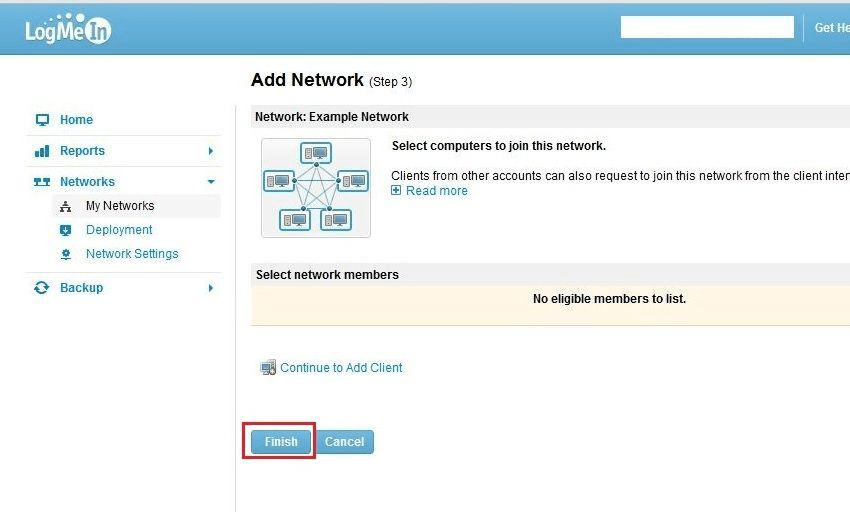
25. Hit Finish.
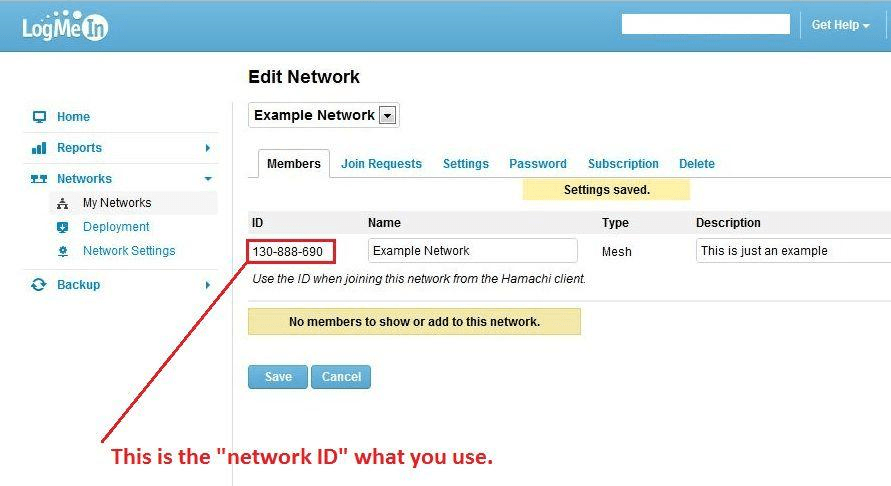
26. This is the ID that you give to your friends so they can join to network.
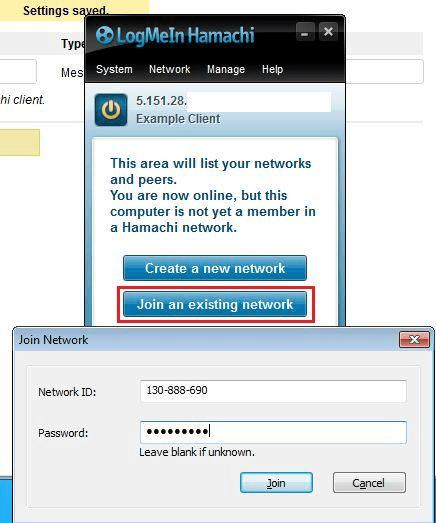
27. Open Hamachi and click Join an existing network, fill your network id and pass to input fields and hit Join.
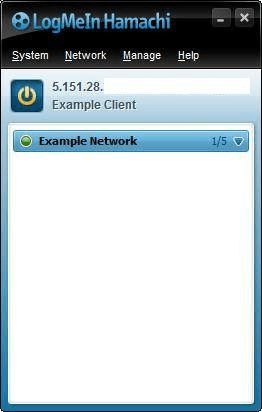
28. Green icon on the left side of your network name shows that it works.
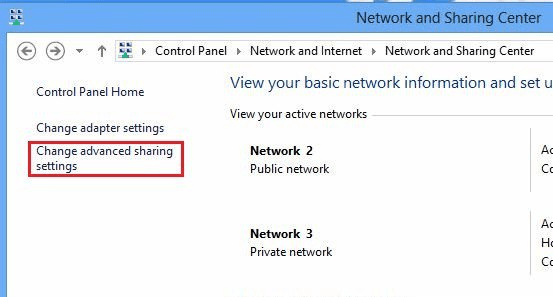
29. Go to Network and Sharing Center and click Change advanced sharing settings.
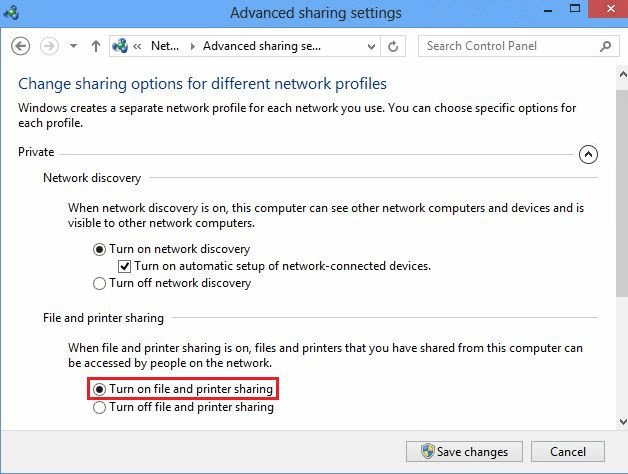
30. Select Turn on file and printer sharing and Save settings.
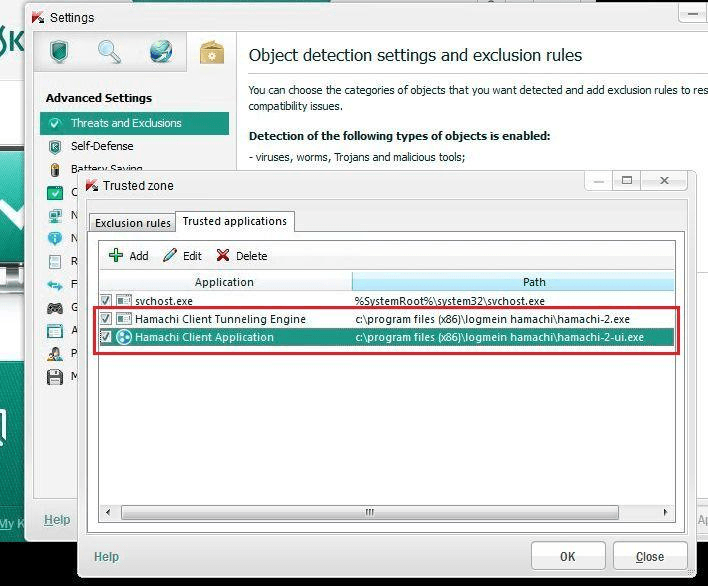
31. Last thing what i do is that, i add Hamachi's two executable's to my internet security's trusted application list.
NAT-Routing and port-forwarding
If your internet connection is NAT-routed, it is possible that you have to add port-forwarding settings to your router. Here is the ports that Hamachi uses:
TCP 12975 (initiator port)
TCP 32976 (session port)
UDP 17771 (relay connection port)
I checked my network monitor:

Hamachi is currently using 12975, but its good to forward all of those 3 ports. So that's it! Me and my friends setup Hamachi like this, and we can ping each other and see created LAN games. We have played Torchlight 2, WarCraft 3, Supreme Commander 1, etc. You should be able to play all LAN games if you do all steps right!
19 Comments