Connect Creality CR-6 SE to PC using USB cable
In this tutorial i'm teaching you how to connect Creality CR-6 SE to PC using USB cable. Installation is easy because you only need right drivers and no further setup. When you have working connection between your computer and 3D printer, you can use slicer like Cura to print directly from software. Live monitoring allows you to see current progress and real temperatures of nozzle and build plate.
Connect your 3D printer to PC using USB-cable
CAUTION! Older CR-6 SE models had a problem that caused damage to the device that was connected to the printer using USB port. So before connecting your computer to your printer using USB cable, you want to read this: https://3dprintingspace.com/t/cr-6-se-usb-problems/82/9.
Install USB drivers for Creality CR-6 SE
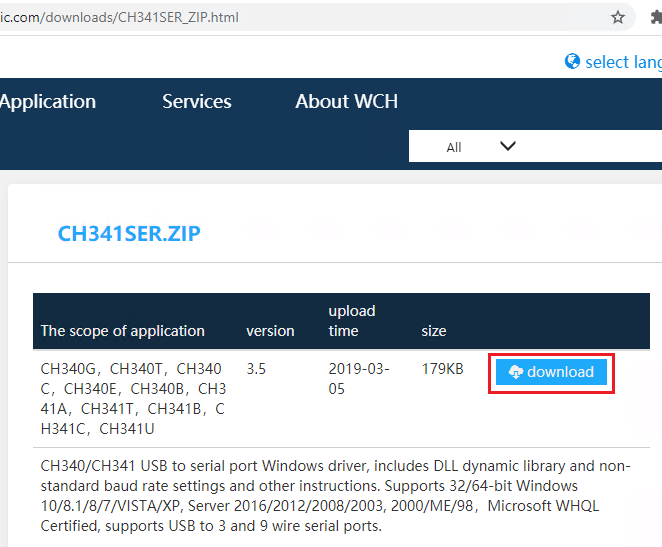
1. First let's download USB drivers for Creality CR-6 SE. Visit this site and download CH341SER.zip: http://www.wch-ic.com/downloads/CH341SER_ZIP.html
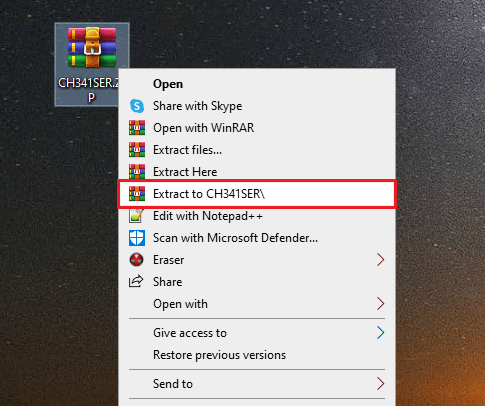
2. Extract CH341SER.zip.
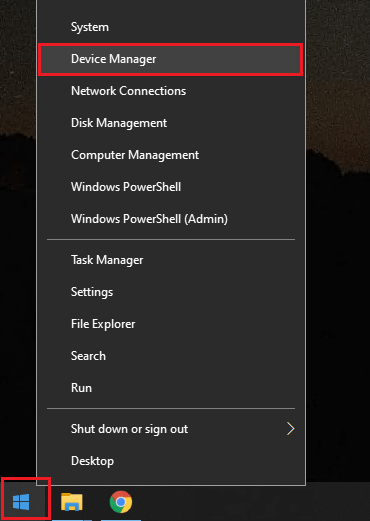
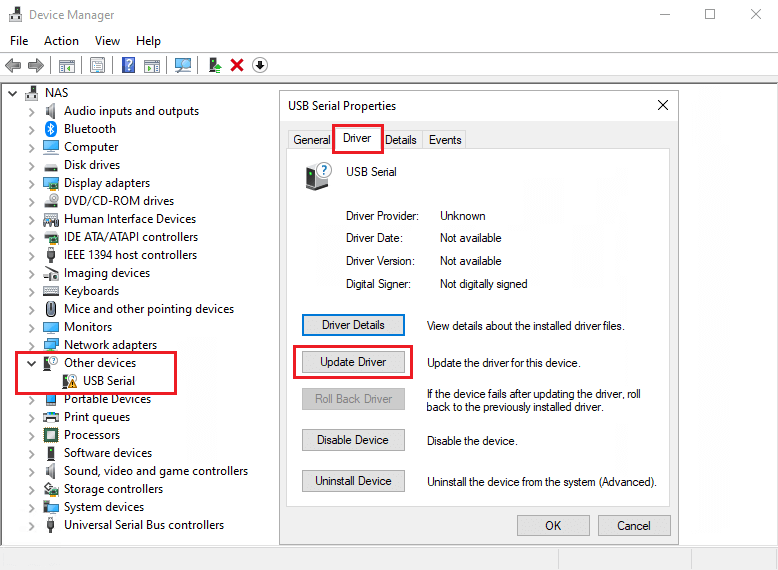
3. Right-click start menu and click Device Manager.
4. Click "USB Serial" in other devices and open Drivers tab and click Update Driver. You cannot see "USB Serial" if your printer isn't already connected to your PC with USB cable.
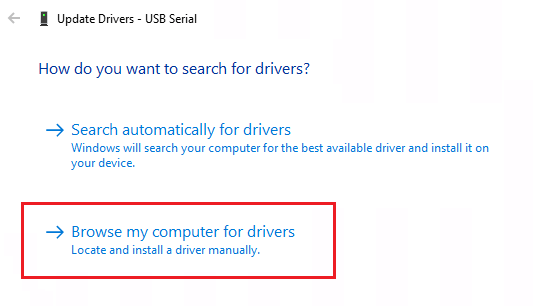
5. Select "Browse my computer for drivers".
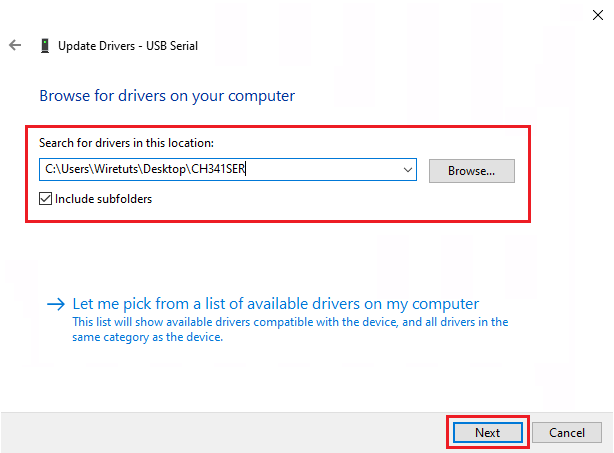
6. Find the folder where you extracted content of CH341SER.zip and hit Next.
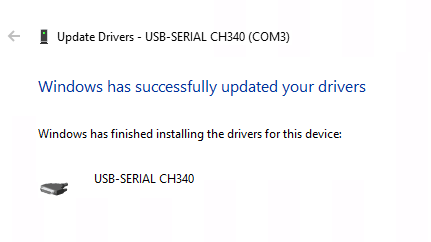
7. Drivers are now successfully installed.
Check that everything works
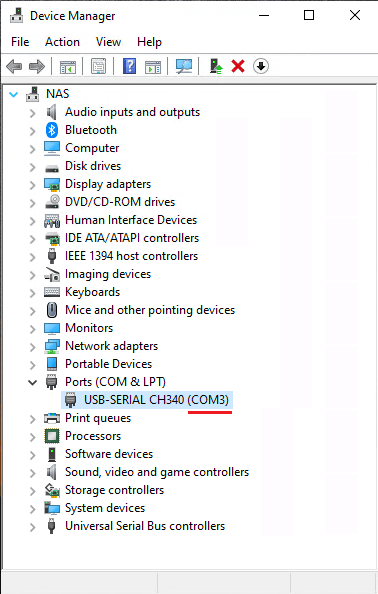
Depending what program you are using, you might need the information what COM port your 3d printer is using. You can see that information from device manager.
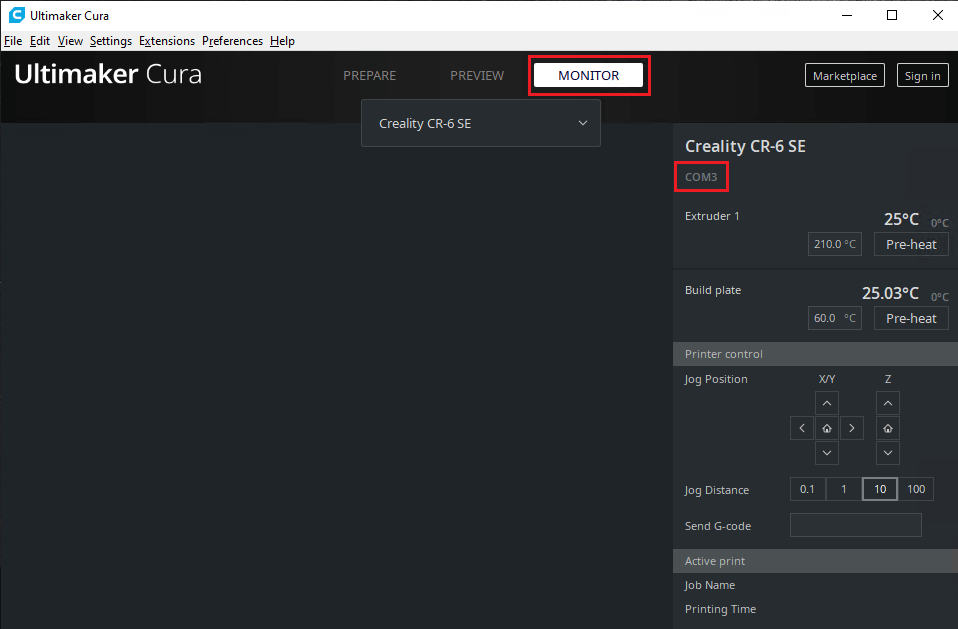
If you now open Cura and Monitor -tab in it, you should see that Cura automatically detects your printer. You can now test that the serial connection works both ways by using Pre-heat -button, and then see if the temperature starts changing. If that is the case, then everything is working.
Problems
If this driver doesn't work with your printer, it is possible that your printer has different USB to serial chip which means that you need different drivers.
5 Comments